Pass Microsoft Certified: Dynamics 365 Sales Functional Consultant Associate Certification Exams in First Attempt Guaranteed!
Get 100% Latest Exam Questions, Accurate & Verified Answers to Pass the Actual Exam!
30 Days Free Updates, Instant Download!

Microsoft Certified: Dynamics 365 Sales Functional Consultant Associate Premium Bundle
- MB-210 Exam
- PL-200 Exam

MB-210 Premium Bundle
- Premium File 414 Questions & Answers
Last update: Jul 03, 2026 - Training Course 54 Video Lectures
- Study Guide 354 Pages
Purchase Individually
Premium File
Training Course

Study Guide
PL-200 Premium Bundle
- Premium File 328 Questions & Answers
Last update: Jun 26, 2026 - Training Course 94 Video Lectures
- Study Guide 800 Pages
Purchase Individually
Premium File
Training Course
Study Guide

MB-210 Exam - Microsoft Dynamics 365 for Sales
MB-210 Premium Bundle
- Premium File 414 Questions & Answers. Last update: Jul 03, 2026
- Training Course 54 Video Lectures
- Study Guide Pages
| Download Free MB-210 Exam Questions |
|---|
PL-200 Exam - Microsoft Power Platform Functional Consultant
PL-200 Premium Bundle
- Premium File 328 Questions & Answers. Last update: Jun 26, 2026
- Training Course 94 Video Lectures
- Study Guide Pages
| Download Free PL-200 Exam Questions |
|---|
Microsoft Microsoft Certified: Dynamics 365 Sales Functional Consultant Associate Certification Practice Test Questions and Answers, Microsoft Microsoft Certified: Dynamics 365 Sales Functional Consultant Associate Certification Exam Dumps
All Microsoft Microsoft Certified: Dynamics 365 Sales Functional Consultant Associate certification exam dumps, study guide, training courses are prepared by industry experts. Microsoft Microsoft Certified: Dynamics 365 Sales Functional Consultant Associate certification practice test questions and answers, exam dumps, study guide and training courses help candidates to study and pass hassle-free!
The Foundation of the Microsoft Certified: Dynamics 365 Sales Functional Consultant Associate
The Microsoft Certified: Dynamics 365 Sales Functional Consultant Associate certification is a professional credential designed for individuals who implement solutions that empower sales teams. It serves as a verifiable testament to one's ability to configure and extend the core sales application to meet specific business requirements. This certification validates that a professional can simplify and enhance the seller experience, enabling them to dedicate more focus to nurturing customer relationships and driving revenue. It is a benchmark for excellence, recognized by organizations globally that rely on Microsoft's ecosystem to manage their sales operations and customer engagement strategies.
Achieving this certification demonstrates a deep understanding of how to apply technical knowledge to practical sales scenarios. It signals to employers and clients that you possess the requisite skills to translate business needs into well-designed, functional solutions. For those starting their careers, it provides a clear and structured learning path. For seasoned professionals, it offers a way to formally recognize their expertise and stay current with the latest technological advancements. This credential is a powerful tool for career progression, helping to shape a professional journey toward greater responsibility and impact within an organization's digital transformation efforts.
The Modern Sales Functional Consultant
The role of a sales functional consultant is multifaceted, blending business acumen with technical proficiency. These professionals act as the critical bridge between the sales department and the IT team. They are tasked with understanding the intricate processes of a sales cycle, from lead generation to closing a deal, and then implementing technology to optimize those processes. The ideal candidate for the Microsoft Certified: Dynamics 365 Sales Functional Consultant Associate certification is someone who is adept at problem-solving and has a passion for improving efficiency and productivity through technology.
This role requires strong communication skills to effectively gather requirements from stakeholders, who can range from sales managers and solution architects to developers and end-users. A functional consultant must document these requirements meticulously and then configure the system to address them. They are responsible for data modeling, user interface design, process automation, and ensuring the security model aligns with organizational policies. They are not just implementers but also trusted advisors who guide the organization on best practices for leveraging the platform to its fullest potential, ultimately helping the sales force succeed in a competitive marketplace.
Core Technologies: Dynamics 365 Sales
At the heart of the Microsoft Certified: Dynamics 365 Sales Functional Consultant Associate certification is a profound knowledge of Dynamics 365 Sales. This application is a comprehensive sales automation solution designed to manage the entire sales lifecycle. It provides sellers with the tools they need to build strong customer relationships, take informed actions based on insights, and close sales more efficiently. Functional consultants must have a deep, hands-on understanding of its capabilities, including lead and opportunity management, sales forecasting, product catalog configuration, and quote-to-order processing.
The platform's strength lies in its ability to provide a unified view of the customer. It consolidates interactions, transaction history, and preferences into a single repository, giving sales teams a complete picture. This enables personalized engagement and proactive selling. A consultant's job is to customize this platform to reflect the unique sales processes and terminology of their organization. This includes creating custom fields, designing forms and views, and building business process flows that guide sellers through each stage of a sale, ensuring consistency and adherence to company standards.
Core Technologies: Microsoft Power Platform
A crucial component of the Microsoft Certified: Dynamics 365 Sales Functional Consultant Associate skill set is proficiency with the Microsoft Power Platform. This suite of low-code tools extends the capabilities of Dynamics 365, allowing for rapid development of custom applications, automated workflows, and insightful data visualizations. The platform consists of several key components, including Power Apps for building custom applications, Power Automate for workflow automation, Power BI for business analytics, and Power Virtual Agents for creating intelligent chatbots. A functional consultant must know how to use these tools in concert.
The synergy between Dynamics 365 Sales and the Power Platform is what enables consultants to create truly tailored solutions. For example, they might build a custom Power App for a specific field sales scenario, or create a Power Automate flow that automatically sends follow-up emails and creates tasks based on opportunity updates. This ability to extend the core application without extensive custom code is a game-changer. It empowers organizations to be more agile and responsive to changing business needs, and it is a fundamental skill measured by the certification exams.
Who Should Pursue This Certification?
This certification is tailored for a diverse audience of professionals who work with or aspire to work with Dynamics 365 Sales. The primary candidates are functional consultants who are actively involved in implementing and configuring the system. However, its relevance extends much further. Sales professionals and business analysts who use the platform daily can benefit by gaining a deeper understanding of its capabilities, allowing them to contribute more effectively to its evolution within their company. It provides them with the language and knowledge to better articulate their needs to the implementation team.
Developers looking to transition into a more consultative role will find this certification invaluable. It helps them build the necessary configuration skills to complement their coding expertise. Similarly, solution architects on a path to expert-level certifications will see this as a foundational step, proving their grasp of the sales application's architecture and capabilities. IT professionals responsible for managing and maintaining the system also fit the profile, as the certification covers key administrative and security tasks that are central to their responsibilities. It is a versatile credential that serves multiple career paths.
Navigating the Certification Path
To earn the Microsoft Certified: Dynamics 365 Sales Functional Consultant Associate certification, candidates must successfully pass two separate exams. The first is Exam PL-200, which focuses on the Microsoft Power Platform. This exam validates a candidate's ability to build applications, automate flows, and manage data within the platform's ecosystem. It establishes the foundational knowledge required to extend and customize model-driven applications like Dynamics 365 Sales. This exam is a prerequisite for several other Dynamics 365 functional consultant associate certifications, making it a valuable and versatile credential in its own right.
The second required exam is MB-210, which concentrates specifically on Microsoft Dynamics 365 Sales. This exam delves deep into the sales application itself, measuring a candidate's ability to configure and manage the core sales entities. It covers topics such as configuring product catalogs, managing the sales pipeline from lead to order, setting up sales territories, and configuring sales-related security roles. Passing both exams demonstrates a comprehensive skill set that encompasses both the core application functionality and the ability to enhance it using the broader low-code platform, fully validating a consultant's readiness for the role.
The Evolving Business Landscape
In today's fast-paced digital economy, companies are making significant investments in cloud infrastructure and next-generation automation technologies. This digital transformation creates a pressing need for skilled professionals who can not only understand these new technologies but also adapt them to solve real-world business problems. The Microsoft Certified: Dynamics 365 Sales Functional Consultant Associate certification directly addresses this demand. It identifies individuals who can bridge the gap between technology's potential and its practical application, delivering better solutions that drive customer success and business growth. This is about fostering tech intensity within an organization.
A strong learning culture is a key driver of success in this new landscape. Certifications play a vital role in fostering this culture by providing clear goals and a structured path for acquiring new skills. Research indicates that a vast majority of certified IT professionals believe that the effort invested in skill acquisition is a major contributor to their success in digital transformation initiatives. Organizations that encourage and support their employees in pursuing these credentials are better positioned to innovate and maintain a competitive edge. This certification is more than a personal achievement; it is a strategic asset for any forward-thinking company.
Structuring a Successful Implementation
A certified Dynamics 365 Sales Functional Consultant Associate plays a pivotal role in the success of an implementation project. Their work begins with the discovery phase, where they collaborate closely with stakeholders to understand the business's pain points and objectives. They lead workshops, conduct interviews, and analyze existing processes to gather a comprehensive set of requirements. This initial phase is critical, as it lays the groundwork for the entire project. A consultant's ability to ask the right questions and truly comprehend the business context is paramount to defining a solution that will deliver tangible value.
Once requirements are gathered, the consultant moves into the design and configuration phase. They model the data, design user-friendly forms and dashboards, and configure the business process flows that will guide users. This involves making key decisions about how to leverage out-of-the-box features versus when to build custom components using the Power Platform. Throughout the project, they work as part of a larger team, coordinating with solution architects on the overall design, with developers on any necessary custom code, and with testers to ensure the solution is robust and meets the specified requirements before deployment.
The Role of PL-200 in the Certification Journey
Exam PL-200, titled Microsoft Power Platform Functional Consultant, is the first of two essential pillars for achieving the Microsoft Certified: Dynamics 365 Sales Functional Consultant Associate certification. This exam serves as a broad foundation, ensuring that every consultant, regardless of their specific application focus, has a deep and practical understanding of the underlying platform. It validates the skills needed to build and customize applications, automate business processes, and manage the data that powers these solutions. For a sales functional consultant, this knowledge is not optional; it is fundamental to delivering modern, agile, and integrated sales solutions.
Passing this exam demonstrates that a candidate can do more than just configure a pre-built application. It proves they can extend its functionality to meet unique and evolving business needs. They can create custom apps for specialized tasks, automate repetitive actions to boost seller productivity, and integrate Dynamics 365 Sales with other systems. Because the Power Platform is the common language across all Dynamics 365 applications, the skills validated by PL-200 are highly transferable. This makes it a strategic first step in the certification journey, opening doors not only to the sales consultant role but to other functional consultant paths as well.
Understanding Microsoft Dataverse
A significant portion of the PL-200 exam is dedicated to Microsoft Dataverse. This is the intelligent, scalable, and secure data platform that underpins both Dynamics 365 applications and custom solutions built on the Power Platform. A functional consultant must have a thorough grasp of Dataverse, as it is where all the critical business data is stored and managed. This includes understanding the data model, which is composed of tables, columns, and relationships. A candidate must know how to create and modify these components to accurately represent an organization's business entities and their connections.
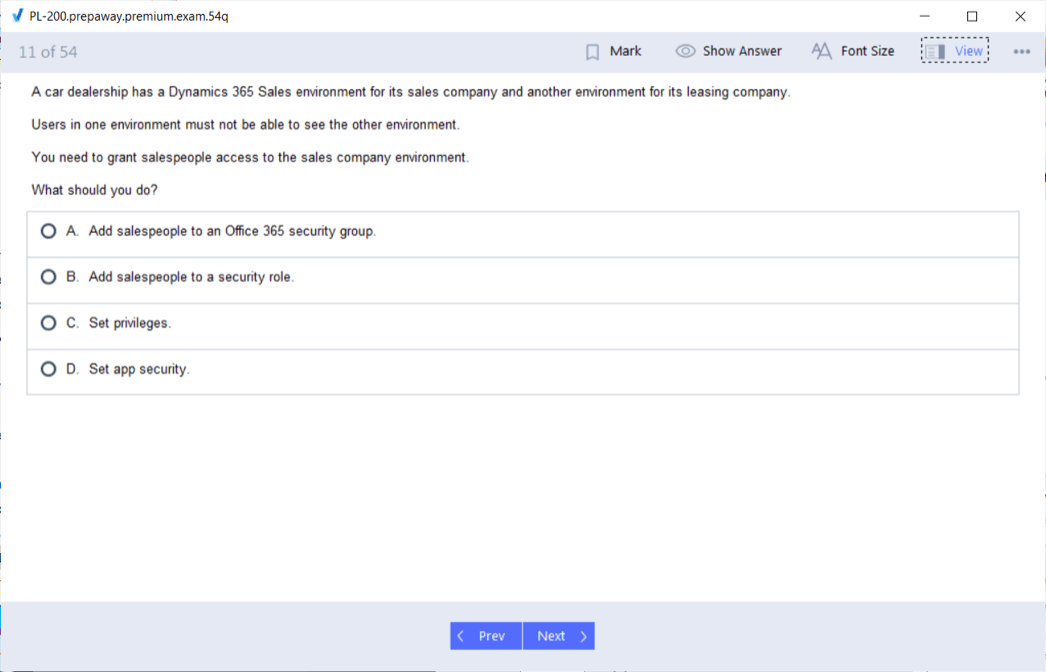
Beyond the basic structure, the exam tests knowledge of more advanced Dataverse features. This includes configuring business rules to apply logic and validation to data entry without writing code, ensuring data integrity. It also covers the security model, which is a critical aspect of any implementation. A consultant must be able to configure security roles, business units, and field-level security to control access to data, ensuring that users can only see and modify the information relevant to their role. Mastery of Dataverse is essential for building robust and secure business applications.
Building Custom Applications with Power Apps
Power Apps is a core component of the Power Platform, and a key skill area for the PL-200 exam. It allows for the rapid creation of custom low-code applications that can run on web and mobile devices. The exam focuses primarily on model-driven apps, which are the type of app that Dynamics 365 Sales is built upon. A candidate for the Microsoft Certified: Dynamics 365 Sales Functional Consultant Associate must demonstrate proficiency in designing and configuring these apps. This includes creating and modifying site maps for navigation, designing forms for data entry, and configuring views to display lists of records.
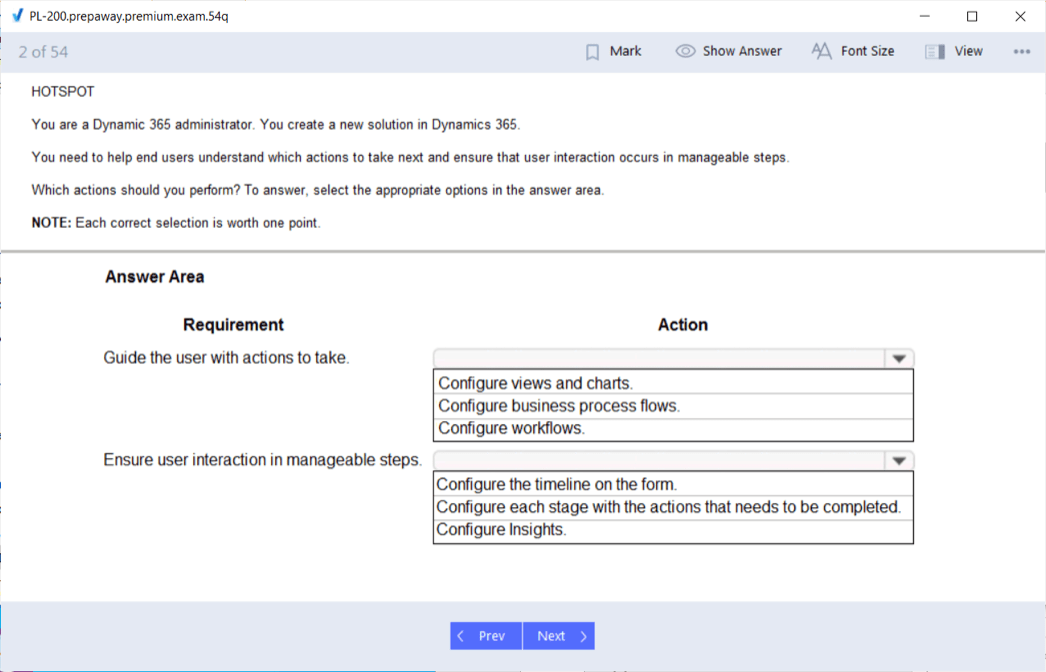
The ability to create compelling user experiences is a central theme. This means designing forms that are intuitive and efficient, organizing fields logically, and using components like sub-grids and quick view forms to display related information. Consultants also need to understand how to embed other components, such as Power BI dashboards, directly into a model-driven app to provide users with contextual analytics. By mastering these skills, a consultant can tailor the user interface to specific roles, streamlining their workflows and increasing user adoption of the system.
Automating Business Processes with Power Automate
Power Automate is the automation engine of the Power Platform, and another critical topic covered in the PL-200 exam. It enables the creation of automated workflows, known as flows, that connect different applications and services. For a sales functional consultant, Power Automate is a powerful tool for eliminating manual, repetitive tasks and ensuring process consistency. The exam assesses a candidate's ability to create various types of flows, including automated flows that trigger based on an event, scheduled flows that run at specific times, and instant flows that are initiated with a button click.
A key aspect tested is the ability to work with connectors, which are the bridges that allow Power Automate to interact with hundreds of different services, both within the Microsoft ecosystem and from third parties. A consultant must know how to build flows that interact with Dataverse, for example, to create a task automatically when an opportunity stage changes in Dynamics 365 Sales. They also need to understand how to implement business logic within a flow, using conditions and loops to handle more complex scenarios. This skill allows them to orchestrate sophisticated processes that span multiple systems.
Creating Reports and Dashboards
While Power BI has its own dedicated certification path, a foundational understanding of its integration with the Power Platform is required for Exam PL-200. Functional consultants are expected to know how to surface data and insights to users effectively. This involves creating system charts and dashboards directly within a model-driven application. These native visualization tools are essential for providing users with a quick, at-a-glance understanding of key metrics and performance indicators, such as sales pipelines, conversion rates, and progress against quotas. A consultant must know how to configure these components to be both informative and visually appealing.
The exam also touches on the integration with Power BI. A consultant should understand how to embed Power BI tiles and dashboards within a model-driven app. This allows for the display of much richer, more interactive analytics than what is available with the native charts. For a sales context, this could mean embedding a detailed Power BI report that analyzes sales trends by region, product, and salesperson directly onto the main sales dashboard. This empowers users with deep, actionable insights right where they work, without needing to switch to a separate application.
Implementing Solutions and Managing Change
A functional consultant's role extends beyond just building the solution; they are also involved in its deployment and management. The PL-200 exam covers the basics of application lifecycle management within the Power Platform. This includes the use of solutions, which are containers for packaging and deploying customizations from one environment to another, such as from a development environment to a testing or production environment. A candidate must understand the difference between managed and unmanaged solutions and know the best practices for moving their configurations safely and efficiently.
This part of the exam also emphasizes the importance of testing and validation. A consultant is responsible for ensuring that the solution they have built meets the specified requirements and is free of defects. They work with testers and business users to conduct thorough testing, document any issues, and manage the resolution process. This holistic view of the implementation process, from initial configuration to final deployment and testing, is a key competency for any successful functional consultant and a core component of the skills measured in the PL-200 exam.
Preparing for the PL-200 Exam
To prepare for this comprehensive exam, candidates should adopt a multi-faceted approach. A great starting point is the official skills outline guide, which provides a detailed breakdown of the topics and their relative weight on the exam. This document should serve as a roadmap for one's study plan. The official online learning portal offers curated learning paths and modules specifically designed for PL-200. These free, self-paced resources provide a structured way to learn the material, combining theoretical knowledge with hands-on labs that allow for practical application in a trial environment.
For those who prefer a more guided learning experience, instructor-led training from official learning partners is an excellent option. These courses are taught by certified trainers and offer a deep dive into the exam topics, with opportunities for live Q&A and peer discussion. Regardless of the chosen method, hands-on experience is non-negotiable. Setting up a personal trial environment and working through real-world scenarios is the best way to solidify one's understanding. Building apps, creating flows, and configuring Dataverse tables will transform abstract concepts into concrete skills, building the confidence needed to succeed.
The Focus of the MB-210 Exam
While Exam PL-200 establishes a consultant's proficiency with the underlying platform, Exam MB-210, Microsoft Dynamics 365 Sales, hones in on the specific application they will be implementing. This exam is the second requirement for the Microsoft Certified: Dynamics 365 Sales Functional Consultant Associate certification and validates a deep, functional knowledge of the sales application itself. It confirms that a consultant has the skills to configure the solution to support an organization's unique sales processes, from initial lead capture through to order fulfillment and invoicing. It is a test of practical application and best practices within the sales domain.
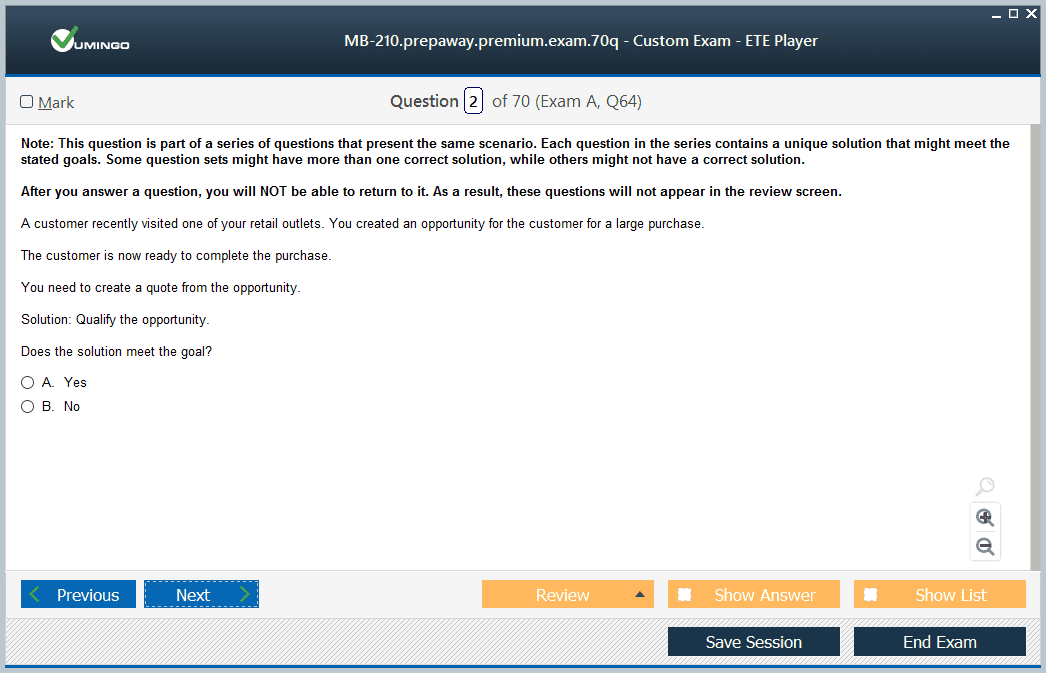
The exam questions are designed to simulate real-world scenarios a consultant would face. They cover the entire spectrum of the application's capabilities, ensuring a candidate can manage the complete sales lifecycle. This includes setting up core sales settings, configuring the product catalog, managing customer records, and guiding sellers through the opportunity pipeline. Success on this exam signifies that a professional is not just a platform expert but is also a specialist in sales process optimization using Microsoft's flagship sales automation tool. It is the final step in proving one's readiness to be a certified sales functional consultant.
Configuring the Core Sales Application
A foundational skill area measured by the MB-210 exam is the ability to perform the initial configuration of the Dynamics 365 Sales application. This involves setting up the system to align with an organization's business practices and terminology. Candidates must be proficient in configuring sales settings, such as defining the fiscal year, setting up auto-numbering for records like quotes and orders, and establishing currency exchange rates for global operations. These settings, while seemingly basic, are critical for the proper functioning of the entire application and for ensuring accurate reporting and analytics.
This domain also covers the configuration of sales territories. A consultant must know how to create a hierarchical territory structure and assign sales team members to the appropriate territories. This is essential for managing sales assignments, tracking regional performance, and ensuring that leads and opportunities are routed to the correct salesperson. Furthermore, the exam tests the ability to configure sales goals and quotas, a key component for measuring team and individual performance. This involves setting up goal metrics and defining rollup queries to track progress against targets over specific periods.
Managing Leads and Opportunities
The heart of any sales process is the management of leads and opportunities, and this is a major focus of the MB-210 exam. A candidate must demonstrate mastery of the lead management process, which includes configuring the system to capture leads from various sources. They must also understand how to create and manage the business process flow for qualifying leads, guiding a user through the steps of converting a promising lead into an account, contact, and opportunity record. This ensures a smooth and consistent transition from initial interest to an active sales cycle.
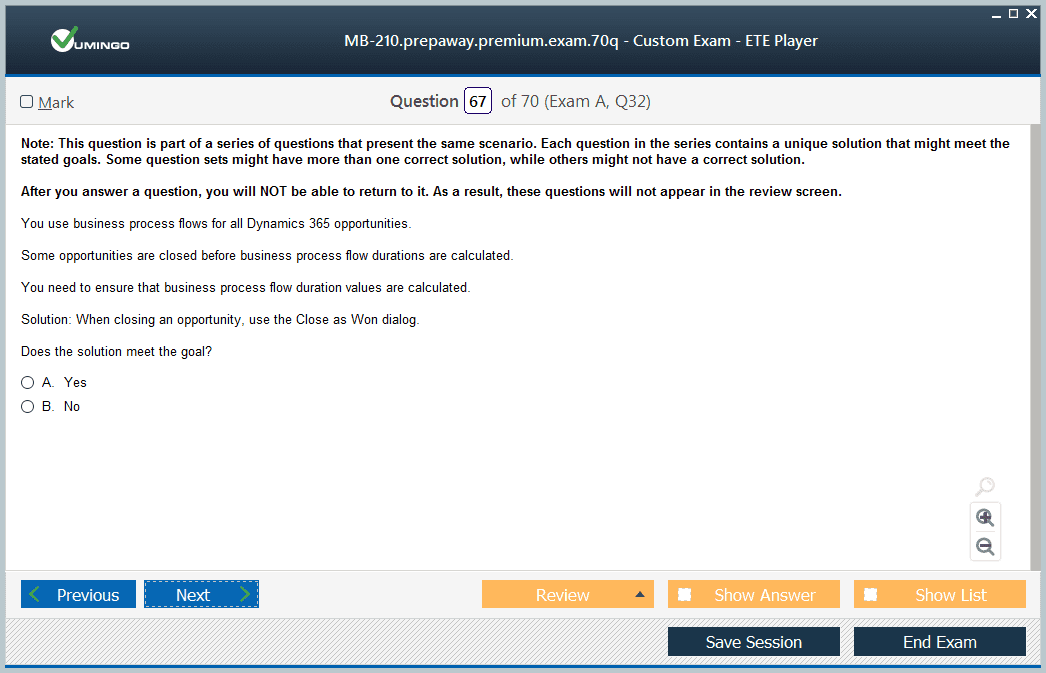
Once a lead is qualified, the focus shifts to opportunity management. The exam requires a deep understanding of how to configure the opportunity entity to reflect the organization's sales stages. A consultant must be able to customize the business process flow for opportunities, defining the key steps and data points required at each stage. They also need to be proficient in managing the sales team on an opportunity, assigning different roles to team members, and configuring connection roles to define relationships between stakeholders. This comprehensive knowledge is vital for providing a 360-degree view of every deal in the pipeline.
Leveraging the Product Catalog
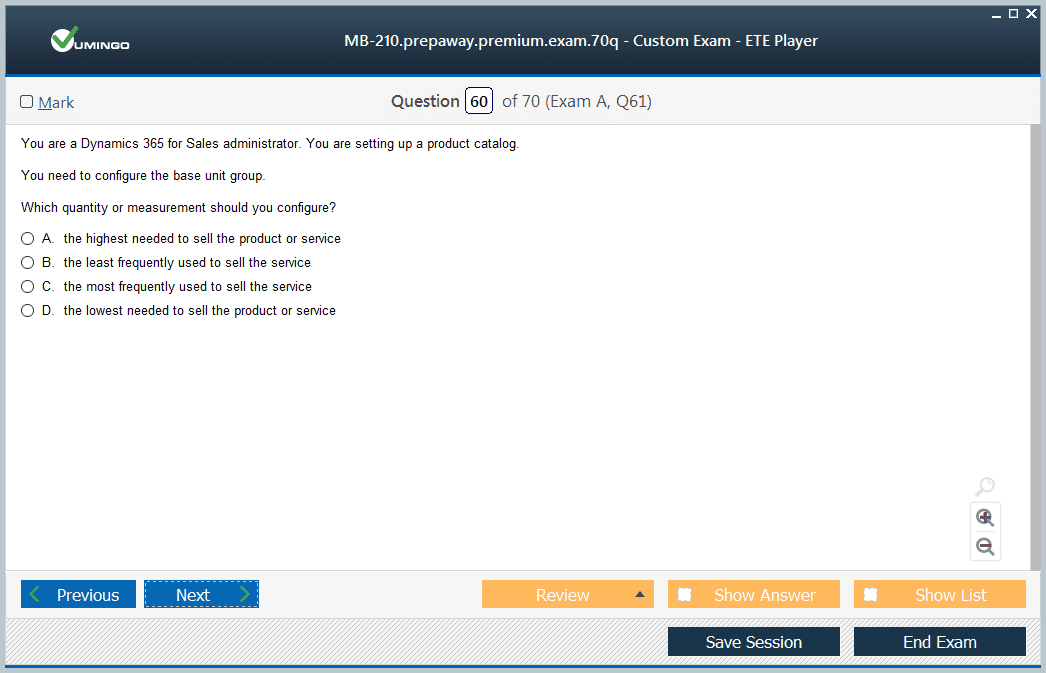
An effective sales process relies on a well-structured and easy-to-use product catalog. The MB-210 exam validates a consultant's ability to configure and manage this critical component. This begins with setting up unit groups and units of measure, which define how products are sold. Candidates must then demonstrate how to create and maintain products and services within the catalog, including managing their properties and writing draft revisions. A key part of this is understanding the product lifecycle, from its creation and publication to its eventual retirement.
The exam also delves into the creation of price lists and discount lists. A consultant must know how to establish multiple price lists for different customer segments, regions, or currencies. They need to be able to configure pricing methods, such as currency amount or percentage of list, and apply discounts based on volume or other criteria. This skill is crucial for enabling sales teams to generate accurate quotes and orders quickly, ensuring that pricing is both competitive and consistent with company policy. A poorly configured product catalog can create significant downstream problems, making this a vital area of expertise.
Processing Quotes, Orders, and Invoices
The final stages of the sales process, from quoting a price to fulfilling an order, are also covered in detail by the MB-210 exam. A consultant must be proficient in configuring the quote lifecycle. This includes understanding how to create quotes from opportunities, activate them for customers, and revise them as negotiations proceed. A key part of this process is converting a successful quote into an order with a single click, which streamlines the workflow and minimizes data entry errors. The exam will test a candidate's ability to manage this entire quote-to-order transition.
From there, the focus shifts to order and invoice management. A consultant must know how to configure the system to fulfill orders and generate invoices. While Dynamics 365 Sales has native capabilities for this, they also need to understand the integration points with dedicated financial systems. The exam assesses the ability to manage the status transitions of these records, from creation through to fulfillment and payment. Mastery of this end-to-end process ensures that the system can support the sales team not just in winning deals, but also in ensuring those deals are processed efficiently and accurately.
Sales Analytics and Insights
To empower a modern sales force, providing them with actionable data and insights is critical. The MB-210 exam requires candidates to demonstrate how to leverage the analytical capabilities within Dynamics 365 Sales. This includes creating and configuring system charts and dashboards to visualize key sales metrics. A consultant should be able to build a sales dashboard that displays the open opportunity pipeline, sales performance against goals, and lead conversion rates, providing managers and sellers with immediate visibility into their business.
The exam also covers the integration with other analytical tools and features. This includes an understanding of how to configure and use built-in features for sales forecasting, which helps organizations predict future revenue with greater accuracy. A consultant should also be familiar with the capabilities of embedded intelligence tools, which can provide relationship analytics, talking points, and competitor tracking directly within the context of an opportunity. These features transform the application from a simple system of record into a proactive tool that helps sellers make smarter decisions.
Study Strategies for the MB-210 Exam
Success on the MB-210 exam requires a combination of theoretical knowledge and practical, hands-on experience. The first step for any candidate should be to thoroughly review the official exam skills outline. This document details every topic that could appear on the exam and is the most reliable guide for structuring a study plan. The official online learning platform provides a wealth of free resources, including learning paths specifically aligned with the MB-210 objectives. These modules are an excellent way to build a strong theoretical foundation across all the required topics.
Beyond self-study, gaining practical experience is essential. If you are not already working with Dynamics 365 Sales daily, it is crucial to get access to a trial or sandbox environment. In this environment, you should practice every configuration task mentioned in the skills outline. Create a product catalog, configure a lead-to-opportunity process, build quotes and orders, and design sales dashboards. This hands-on practice will solidify your understanding and prepare you for the scenario-based questions that are common on the exam. Taking an official practice exam can also be a valuable tool for assessing your readiness and identifying any remaining knowledge gaps.
The Value of Industry-Recognized Certification
In a competitive job market, the Microsoft Certified: Dynamics 365 Sales Functional Consultant Associate certification serves as a powerful differentiator. It is more than just a line item on a resume; it is a verifiable credential from a global technology leader. This certification validates to the world that you possess a specific, in-demand skill set. It tells potential employers, clients, and colleagues that you have not only theoretical knowledge but also the practical ability to implement and manage sophisticated sales solutions. This level of validation can significantly enhance your professional standing and credibility within the industry.
For organizations, hiring certified professionals reduces risk. It provides an assurance that the individual has met a rigorous standard of competence and is equipped to handle the complexities of a Dynamics 365 implementation. This can lead to faster hiring decisions and greater confidence in a candidate's ability to contribute from day one. In a project-based environment, this certification allows you to market yourself more effectively for new engagements. It signals that you are committed to professional development and are current with the latest platform features and best practices.
Impact on Earning Potential
Numerous industry surveys consistently highlight a positive correlation between IT certification and earning potential. While experience remains a key factor in determining salary, holding a respected credential like the Microsoft Certified: Dynamics 365 Sales Functional Consultant Associate can provide a significant financial advantage. Salary surveys from recruitment firms specializing in the Microsoft ecosystem often show that certified professionals command higher salaries than their non-certified peers with similar levels of experience. This is a direct reflection of the value that organizations place on proven skills.
Many companies view certification as an investment in their employees and are willing to reward that investment. It can be a key factor in salary negotiations for a new role or a justification for a raise in a current position. One study noted that a significant percentage of IT professionals who received a raise attributed it directly to acquiring new skills, often validated by a new certification. The return on investment for obtaining this certification, both in terms of time and exam fees, can be realized quickly through increased earning potential over the course of one's career.
Opening Doors to New Career Paths
Earning the Microsoft Certified: Dynamics 365 Sales Functional Consultant Associate certification can be a catalyst for significant career growth. For those already in a consultant role, it solidifies their expertise and can lead to more senior positions, greater project responsibility, and opportunities to lead implementation teams. It demonstrates a commitment to the Microsoft technology stack that is highly valued by employers and partners within the ecosystem. It is a clear marker of a professional who is serious about their craft and dedicated to excellence.
This certification also serves as a gateway to other related and more advanced roles. The skills acquired are foundational for aspiring solution architects. A functional consultant with a deep understanding of the sales application is well-positioned to eventually move into a solution architect role, where they would be responsible for designing end-to-end solutions that span multiple applications. The certification journey map provided by Microsoft clearly illustrates this pathway, showing how associate-level certifications can lead to expert-level credentials like the Power Platform Solution Architect Expert, representing the pinnacle of expertise in the field.
Developing Essential Business Acumen
While this is a technical certification, the process of preparing for it inherently develops a candidate's business acumen, particularly in the sales domain. To successfully configure the application, one must first understand the underlying business processes it is meant to support. You must learn the language of sales, including concepts like sales funnels, conversion rates, pipeline management, and forecasting. This blend of technical skill and business understanding is a rare and highly sought-after combination. Employers are not just looking for people who can configure software; they are looking for partners who can help them solve business problems.
Surveys of employers in the technology space often list business acumen as one of the most desirable hard skills. This certification forces you to think like a business stakeholder. You have to consider why a particular process is in place, what its objectives are, and how technology can make it better. This consultative mindset is invaluable. It allows you to have more strategic conversations with clients and internal teams, positioning you as a trusted advisor rather than just a technician. This ability to bridge the gap between business and technology is a key driver of long-term career success.
Leveraging Your Certification for Visibility
Once you have earned the Microsoft Certified: Dynamics 365 Sales Functional Consultant Associate certification, it is crucial to make your achievement visible. This starts with updating your profile on professional networking platforms. Adding the certification to your profile immediately highlights your expertise to recruiters and hiring managers who are actively searching for candidates with these specific skills. Many of these platforms have dedicated sections for licenses and certifications, making it easy for your credentials to stand out. It acts as a digital badge of honor that validates your qualifications.
Microsoft partners with digital badging platforms that allow you to share a verifiable record of your accomplishment. You will typically receive instructions on how to claim your digital badge upon passing the required exams. This badge can be shared on your professional profiles, in your email signature, or on a personal website. It is more than just an image; it is a link to a metadata page that provides details about what you did to earn the credential and the skills you have demonstrated. This makes it easy for others to understand the significance of your achievement.
The Importance of Continuous Learning
The world of cloud technology is in a constant state of evolution. New features, improved capabilities, and entirely new services are released on a regular basis. The Microsoft Certified: Dynamics 365 Sales Functional Consultant Associate certification is not a one-time achievement but rather a commitment to continuous learning. To maintain the value of the credential, Microsoft requires certificate holders to renew it periodically. This process ensures that your skills remain current and relevant in a rapidly changing technological landscape. It signals to the market that your knowledge is up-to-date with the latest product releases.
This renewal process, which is typically done through a free online assessment, encourages professionals to stay engaged with the platform's evolution. It fosters a mindset of lifelong learning, which is essential for a successful career in technology. By keeping your certification active, you demonstrate a dedication to your professional development. This commitment is highly regarded by employers and is a key characteristic of top performers in any technical field. The journey doesn't end when you pass the exams; it simply marks a new chapter in your ongoing professional growth.
Building Confidence and Job Satisfaction
Beyond the tangible benefits of salary and career opportunities, certification has a significant impact on a professional's confidence. The rigorous process of studying for and passing two challenging exams provides a profound sense of accomplishment. It affirms your expertise and can reduce feelings of imposter syndrome that are common in technical roles. Research from certification providers has shown that a large majority of certified individuals report greater self-confidence in their abilities after earning a credential. This newfound confidence can translate into better performance on the job and a greater willingness to take on new challenges.
This increased confidence often leads to higher job satisfaction. When you have a deep understanding of the tools you work with, you are better equipped to solve problems efficiently and creatively. You can deliver better solutions, which leads to positive feedback from users and stakeholders. This sense of mastery and the ability to make a tangible impact are major contributors to professional fulfillment. The knowledge gained through the certification process is directly transferable to real-world work situations, making your day-to-day tasks more manageable and more rewarding.
Mapping Your Learning Journey
Embarking on the path to the Microsoft Certified: Dynamics 365 Sales Functional Consultant Associate certification requires a structured and strategic approach. The first step is a period of self-assessment to determine if this certification aligns with your career goals and current skill set. Microsoft provides a valuable tool for this in the form of a journey map. This visual guide outlines the entire process, from initial consideration to post-certification growth. It helps you understand the prerequisites, the exams involved, the skills measured, and the potential career paths that open up after certification.
Following the sequence on the journey map provides a clear roadmap. It starts by helping you decide if you are a good fit for the role. From there, it guides you toward the necessary training resources. A critical part of this mapping process is reviewing the detailed skills outline guides for both Exam PL-200 and Exam MB-210. These documents are the official blueprints for the exams, detailing every objective you will be measured on. Using these guides as a checklist is the most effective way to structure your studies and ensure you cover all required content.
Choosing Your Preferred Training Method
Every individual has a unique learning style, and preparing for the Microsoft Certified: Dynamics 365 Sales Functional Consultant Associate certification offers a variety of training options to accommodate this. For self-directed learners, the official online learning portal is an invaluable resource. It hosts a vast collection of free, self-paced learning paths and modules curated specifically for the two required exams. These resources include detailed explanations, examples, and hands-on labs that allow you to practice your skills in a real environment. This method offers maximum flexibility, allowing you to learn at your own pace and on your own schedule.
For those who benefit from a more structured and interactive environment, instructor-led training is an excellent alternative. These courses are delivered by Microsoft Certified Trainers through a network of official learning partners. This format provides a deep dive into the exam curriculum, led by an expert who can answer questions, provide clarification, and share real-world insights. The classroom setting, whether virtual or in-person, also allows for valuable interaction with peers who are on the same learning journey. This collaborative environment can enhance understanding and help build a professional network.
The Critical Role of Hands-On Experience
Theoretical knowledge alone is insufficient to pass the scenario-based exams for the Microsoft Certified: Dynamics 365 Sales Functional Consultant Associate certification. Gaining practical, hands-on experience is arguably the most important aspect of your preparation. If you do not yet feel ready to take the exams, seek out opportunities to apply your learning. Volunteer for a project that involves a model-driven app implementation. Offer to assist a senior functional consultant or solution architect who works with Dynamics 365 Sales daily. This real-world exposure will be invaluable.
Setting up your own developer or trial environment is a crucial step. This gives you a safe sandbox where you can experiment without fear of breaking a production system. Work through the labs provided in the official learning materials, but also go beyond them. Create your own mini-projects. For example, try to build a simple application to track a personal hobby, configuring the data model, forms, and business process flows. This practical application of knowledge is what bridges the gap between understanding a concept and mastering its implementation, a distinction that is critical for exam success.
Utilizing Practice Exams
As you approach your exam date, taking a practice test is a highly effective way to gauge your readiness. Official practice exams are designed to mimic the format, style, and difficulty of the real certification test. They provide an excellent opportunity to familiarize yourself with the types of questions you will encounter, such as multiple-choice, case study, and build-list questions. This helps reduce anxiety on exam day, as the experience will feel more familiar. It also helps you practice your time management skills, ensuring you can complete all questions within the allotted time.
The primary benefit of a practice exam is its diagnostic capability. Upon completion, you will receive a detailed score report that breaks down your performance by each objective or skill area. This allows you to pinpoint your specific areas of weakness. Perhaps you are strong in configuring opportunities but need more work on the product catalog. With this information, you can focus your final study efforts where they are most needed, reviewing relevant modules and practicing specific tasks. This targeted approach is far more efficient than simply re-reading all the material.
The Importance of Community Engagement
Your learning and professional growth should not happen in isolation. Engaging with the broader community of Dynamics 365 and Power Platform professionals is a fantastic way to supplement your learning and stay current. There are numerous online community forums where you can ask questions, share your knowledge, and learn from the experiences of others. These forums are frequented by a diverse group of people, from beginners to seasoned experts and Microsoft employees, providing a rich source of information and support.
Professional networking platforms are also home to vibrant groups dedicated to these technologies. Joining these groups allows you to follow discussions, learn about new features, and discover job opportunities. It helps you build a network of peers whom you can turn to for advice throughout your career. Sharing your own journey, including your challenges and successes in preparing for the Microsoft Certified: Dynamics 365 Sales Functional Consultant Associate certification, can be a great way to connect with others and establish your presence within the community.
Renewing Your Certification
Achieving the Microsoft Certified: Dynamics 365 Sales Functional Consultant Associate certification is a significant milestone, but the journey does not end there. To ensure that your skills remain relevant in the fast-evolving world of cloud technology, Microsoft certifications have an expiration date. The good news is that the renewal process is designed to be straightforward and accessible. You can renew your certification for free by passing an online renewal assessment available on the official learning portal. This assessment can be taken anytime within the six months leading up to your certification's expiration date.
The renewal assessment is not as long or as broad as the initial exams. It focuses on the latest updates and changes to the platform, ensuring that your knowledge is current. The learning portal provides a collection of curated modules to help you prepare for the assessment, making it easy to catch up on what's new. This process of continuous validation reinforces the value of your credential, signaling to the industry that you are committed to maintaining your expertise. It is an integral part of the certification lifecycle and a key aspect of long-term career management.
Exploring Further Certification Paths
The Microsoft Certified: Dynamics 365 Sales Functional Consultant Associate certification can be a destination in itself, or it can be a stepping stone on a broader certification journey. The skills you gain, particularly from the PL-200 exam, are foundational for several other functional consultant roles. If you wish to broaden your expertise, you might consider pursuing certifications in other Dynamics 365 applications, such as Marketing, Field Service, or Customer Service. Each of these also requires passing the PL-200 exam, meaning you would only need to pass one additional application-specific exam to earn another associate certification.
For those with ambitions to move into solution design and architecture, the ultimate goal might be an expert-level certification. The Microsoft Certified: Power Platform Solution Architect Expert credential is a logical next step for experienced functional consultants. This certification validates your ability to lead successful implementations and design complex solutions that meet the strategic needs of an organization. Mapping out these possibilities allows you to think strategically about your career development, using each certification as a building block toward your ultimate professional goals.
Microsoft Certified: Dynamics 365 Sales Functional Consultant Associate certification practice test questions and answers, training course, study guide are uploaded in ETE files format by real users. Study and pass Microsoft Microsoft Certified: Dynamics 365 Sales Functional Consultant Associate certification exam dumps & practice test questions and answers are the best available resource to help students pass at the first attempt.


