Pass Cisco CCNP Security Certification Exams in First Attempt Guaranteed!
Get 100% Latest Exam Questions, Accurate & Verified Answers to Pass the Actual Exam!
30 Days Free Updates, Instant Download!


CCNP Security Premium Bundle
- 300-715 Exam
- 350-701 Exam

300-715 Premium Bundle
- Premium File 407 Questions & Answers
Last update: Jun 22, 2026 - Training Course 73 Video Lectures
- Study Guide 1897 Pages
Purchase Individually

Premium File
Training Course

Study Guide
350-701 Premium Bundle
- Premium File 690 Questions & Answers
Last update: Jun 26, 2026 - Training Course 299 Video Lectures
- Study Guide 701 Pages
Purchase Individually
Premium File
Training Course
Study Guide


300-715 Exam - Implementing and Configuring Cisco Identity Services Engine (300-715 SISE)
300-715 Premium Bundle
- Premium File 407 Questions & Answers. Last update: Jun 22, 2026
- Training Course 73 Video Lectures
- Study Guide Pages
| Download Free 300-715 Exam Questions |
|---|
350-701 Exam - Implementing and Operating Cisco Security Core Technologies
350-701 Premium Bundle
- Premium File 690 Questions & Answers. Last update: Jun 26, 2026
- Training Course 299 Video Lectures
- Study Guide Pages
| Download Free 350-701 Exam Questions |
|---|
Cisco CCNP Security Certification Practice Test Questions and Answers, Cisco CCNP Security Certification Exam Dumps
All Cisco CCNP Security certification exam dumps, study guide, training courses are prepared by industry experts. Cisco CCNP Security certification practice test questions and answers, exam dumps, study guide and training courses help candidates to study and pass hassle-free!
An Introduction to the CCNP Security Certification and the Modern Threat Landscape
In today's interconnected digital landscape, the importance of robust network security cannot be overstated. Organizations of all sizes, from small businesses to multinational corporations, rely on their networks for daily operations, communication, and data storage. This reliance, however, makes them prime targets for a wide array of cyber threats. As technology advances, so do the methods employed by malicious actors. This constant evolution of threats necessitates a new generation of security professionals who are not just knowledgeable but also highly skilled in implementing and managing advanced security solutions. This is where professional certifications play a crucial role in validating expertise.
The field of cybersecurity is no longer a niche specialization within IT but a fundamental pillar of modern business strategy. A single security breach can lead to devastating consequences, including financial loss, reputational damage, and legal liabilities. Consequently, the demand for certified security experts has skyrocketed. Professionals who can demonstrate their ability to design, deploy, and troubleshoot complex security architectures are invaluable assets. The CCNP Security certification is designed to identify and cultivate these exact skills, providing a clear pathway for individuals looking to establish themselves as leaders in the network security domain.
Understanding the Cisco Certification Hierarchy
Cisco Systems, a global leader in networking technology, has established a comprehensive and highly respected certification program. This program is structured in a tiered hierarchy to cater to different levels of expertise and career stages. At the entry-level is the Cisco Certified Network Associate (CCNA), which provides a foundational understanding of networking principles. This certification is often the starting point for many IT professionals, covering a broad range of topics from routing and switching to basic security concepts. It serves as the essential groundwork upon which more advanced knowledge can be built, making it a popular prerequisite for higher-level studies.
Moving up the ladder, the Cisco Certified Network Professional (CCNP) level represents a more advanced, specialized stage of expertise. The CCNP is not a single certification but a collection of tracks focused on specific areas such as Enterprise, Data Center, Service Provider, Collaboration, and of course, Security. Achieving a CCNP certification signifies a deep understanding and the practical ability to handle complex network solutions within a chosen domain. The CCNP Security track, in particular, is tailored for professionals who are responsible for the security of Cisco networks and infrastructure, requiring a much deeper knowledge base than the CCNA.
At the pinnacle of the Cisco certification path is the Cisco Certified Internetwork Expert (CCIE). This expert-level certification is one of the most prestigious in the IT industry, recognized worldwide as a mark of supreme technical skill. The CCIE validates the ability to plan, operate, and troubleshoot complex, converged network infrastructures on a global scale. Earning the core exam for the CCNP Security certification, known as SCOR 350-701, is a significant milestone as it also qualifies the candidate to attempt the rigorous CCIE Security lab exam, bridging the professional and expert levels of Cisco's certification framework.
What is the CCNP Security Certification?
The CCNP Security certification is a professional-level credential specifically designed for network engineers and IT professionals who manage and implement security solutions on Cisco networking devices. This certification validates a broad range of skills required to secure routers, switches, and other network infrastructure components. It goes beyond basic security measures, delving into advanced topics such as firewall management, virtual private networks (VPNs), intrusion prevention systems (IPS), and endpoint security. The program is engineered to ensure that certified individuals are fully prepared to handle the security challenges of modern enterprise networks.
To achieve the CCNP Security certification, a candidate must pass two separate examinations. The first is a core exam, SCOR 350-701, which covers the fundamentals of security across various domains, including network, cloud, content, and endpoint security. This exam provides a broad yet deep foundation. After successfully passing the core exam, the candidate must then choose and pass one of several concentration exams. These concentration exams allow for specialization in a specific technology area, such as Cisco Firepower, Identity Services Engine (ISE), or VPN solutions, enabling professionals to align their certification with their job role and career aspirations.
The curriculum for the CCNP Security is continuously updated to reflect the current state of cybersecurity. Cisco recognizes that security is not a static field; it is a dynamic battleground where new threats and vulnerabilities emerge daily. Therefore, the certification places a strong emphasis on modern security principles, including automation and the concept of security at scale. This forward-looking approach ensures that CCNP Security certified professionals are equipped not only with current best practices but also with the knowledge needed to adapt to the future of network security, making them highly valuable to employers.
The Modern Digital Threat Landscape
Understanding the context in which the CCNP Security certification operates requires a clear view of the modern digital threat landscape. Today's cyber threats are more sophisticated, targeted, and persistent than ever before. Malicious actors range from individual hackers and organized criminal groups to state-sponsored entities, each with different motivations and capabilities. They employ a diverse arsenal of attack vectors to compromise networks, steal data, and disrupt services. These threats include advanced malware, such as ransomware and spyware, which can encrypt critical data or exfiltrate sensitive information without detection.
Phishing and social engineering remain some of the most effective methods for gaining initial access to a network. Attackers craft convincing emails, messages, or websites to trick users into revealing their credentials or downloading malicious payloads. Once inside, they can move laterally across the network to escalate privileges and access high-value assets. Another prevalent threat is the Denial-of-Service (DoS) and Distributed Denial-of-Service (DDoS) attack, which aims to overwhelm a network or service with traffic, rendering it unavailable to legitimate users and causing significant operational disruption.
Furthermore, the rise of Advanced Persistent Threats (APTs) presents a significant challenge for security professionals. APTs are long-term, stealthy attack campaigns where an intruder establishes an undetected presence within a network to steal data over an extended period. These attacks are highly targeted and well-resourced, often bypassing traditional security defenses. The CCNP Security syllabus is specifically designed to address these complex threats, covering technologies and strategies needed to build a defense-in-depth security posture that can detect, prevent, and respond to such sophisticated attacks effectively.
The Role of a CCNP Security Professional
A professional holding a CCNP Security certification is expected to perform a wide range of critical functions within an organization. Their primary role is to safeguard the organization's network infrastructure from an ever-growing list of cyber threats. This involves more than just configuring firewalls; it encompasses a holistic approach to security. These professionals are responsible for designing and implementing comprehensive security policies, ensuring that all aspects of the network adhere to established security standards and best practices. They work to create a multi-layered defense strategy that protects data both in transit and at rest.
The day-to-day responsibilities of a CCNP Security professional often include the deployment and management of various security appliances and solutions. This includes next-generation firewalls (NGFWs) for advanced threat protection, intrusion prevention systems (IPS) to detect and block malicious activity, and secure VPNs to protect remote communications. They are also tasked with managing endpoint security solutions to protect individual devices like laptops and servers, as well as securing cloud environments as organizations increasingly adopt cloud computing services. Their expertise is crucial for maintaining the operational integrity of these complex systems.
Beyond implementation, a CCNP Security professional plays a vital role in network monitoring and incident response. They use advanced tools to maintain visibility across the network, looking for signs of compromise or anomalous behavior. When a security incident is detected, they are at the forefront of the response effort, working to contain the threat, mitigate the damage, and restore normal operations as quickly as possible. This requires not only deep technical knowledge but also strong analytical and problem-solving skills, making them an indispensable part of any modern security operations team.
Why a Vendor-Specific Certification Matters
While vendor-neutral certifications like CompTIA Security+ provide a broad and valuable foundation in security principles, vendor-specific certifications like the CCNP Security offer a different and equally important kind of expertise. In the real world, networks are built with equipment from specific manufacturers. A deep, practical knowledge of the configuration, management, and troubleshooting of that specific equipment is essential for effective security implementation. The CCNP Security certification focuses squarely on the Cisco ecosystem, which holds a significant share of the global networking market.
This specialization means that a certified professional understands the specific capabilities and intricacies of Cisco security products. They know how to leverage the advanced features of a Cisco ASA or Firepower firewall, how to properly configure an Identity Services Engine (ISE) for network access control, and how to build resilient VPN tunnels using Cisco routers. This hands-on, product-specific knowledge is what allows them to translate security theory into practice within a Cisco environment. Employers who have invested heavily in Cisco infrastructure actively seek out professionals with this specialized skill set to maximize their return on investment and ensure their network is secure.
Moreover, the CCNP Security certification curriculum is developed by the same company that engineers the hardware and software. This ensures that the training and exams are perfectly aligned with the technology's intended use and latest features. It covers not just the "what" but the "how" and "why" of implementing security on Cisco devices. This level of depth is difficult to achieve with a vendor-neutral approach. It prepares professionals for the specific technical challenges they will face in their daily job roles, making them more effective and efficient from day one.
Core Principles Covered in CCNP Security
The CCNP Security program is built upon a foundation of core security principles that are universally applicable but are taught through the lens of Cisco technologies. One of the central tenets is the concept of a defense-in-depth architecture. This security approach involves layering multiple, diverse security controls throughout the network. The idea is that if one layer of defense is breached, subsequent layers are in place to detect and stop the attack. The certification covers how to implement this using various Cisco solutions, from perimeter firewalls to internal network segmentation and endpoint protection.
Another key principle is the CIA triad, which stands for Confidentiality, Integrity, and Availability. These are the three pillars of information security. Confidentiality ensures that data is accessible only to authorized users, typically achieved through encryption and access controls. Integrity guarantees that data is accurate and has not been tampered with, often managed through hashing algorithms and digital signatures. Availability ensures that systems and data are accessible to authorized users when needed. The CCNP Security curriculum teaches how to apply these principles using Cisco tools to protect an organization's critical assets.
The certification also places a strong emphasis on modern security frameworks like Zero Trust. The Zero Trust model operates on the principle of "never trust, always verify," meaning no user or device is trusted by default, regardless of whether they are inside or outside the network perimeter. Every access request must be thoroughly verified and authenticated before being granted. The CCNP Security program explores how to implement Zero Trust principles using technologies like Cisco's Identity Services Engine (ISE) and multi-factor authentication (MFA) to create a more resilient and granular security posture against modern threats.
Understanding the SCOR 350-701 Exam
The journey to achieving the CCNP Security certification begins with passing the core examination, designated as SCOR 350-701: Implementing and Operating Cisco Security Core Technologies. This exam serves as the foundational pillar of the certification track, testing a candidate's comprehensive knowledge of core security concepts and their application across a wide range of technologies. It is a 120-minute exam that assesses skills related to implementing and operating security solutions. Passing the SCOR exam is a mandatory first step before a candidate can pursue a specialized concentration exam to complete the full certification.
The SCOR exam is designed to be broad in scope, ensuring that a certified professional has a well-rounded understanding of the entire security landscape as it pertains to Cisco technologies. It is not limited to a single product or domain but instead integrates concepts from network security, cloud security, content security, endpoint protection, and secure network access. This comprehensive approach reflects the reality of modern security roles, where professionals must be able to manage and integrate a diverse set of security tools to create a cohesive defense strategy. Its breadth is what makes it both challenging and valuable.
Successfully passing the SCOR 350-701 exam not only counts toward the CCNP Security certification but also grants the candidate a Cisco Certified Specialist - Security Core certification. This provides immediate recognition of their foundational security skills. Furthermore, as mentioned previously, it is the qualifying exam for the CCIE Security lab, making it a critical stepping stone for those with ambitions of reaching the expert level. The exam validates the knowledge required for professional-level security roles, focusing on the skills needed to implement, operate, and troubleshoot complex security infrastructures.
Exam Domain 1: Security Concepts
The first and largest domain of the SCOR exam blueprint is Security Concepts, accounting for a significant portion of the total score. This section covers the fundamental principles and theories that underpin all modern cybersecurity practices. A key topic within this domain is cryptography. Candidates are expected to understand the differences between symmetric and asymmetric encryption, hashing algorithms, and the role of a Public Key Infrastructure (PKI). This includes knowledge of digital certificates, certificate authorities, and the protocols that rely on them, such as SSL/TLS for securing web traffic.
This domain also delves into foundational security principles like the CIA triad (Confidentiality, Integrity, Availability) and risk management. Candidates must be able to describe common threat vectors, vulnerabilities, and exploits, such as malware, phishing, and denial-of-service attacks. The curriculum explores various security models and frameworks, including the concept of defense-in-depth and the Zero Trust security model. Understanding these high-level concepts is crucial as they inform the design and implementation of every security architecture. It's about knowing the 'why' behind the security controls being deployed.
Furthermore, this section covers secure network design and architecture. This involves understanding concepts like network segmentation to isolate critical assets, secure access control policies, and the placement of security devices like firewalls and intrusion prevention systems within the network. It also tests knowledge of security for virtualization and cloud environments. This domain lays the essential theoretical groundwork upon which all the practical, technology-specific knowledge in the subsequent domains is built. A strong grasp of these security concepts is non-negotiable for anyone aspiring to become a CCNP Security professional.
Exam Domain 2: Network Security
The Network Security domain focuses on the technologies and techniques used to protect the network infrastructure itself. This is a highly practical section that deals with the configuration and management of core security appliances. A major component is firewall technology, particularly Cisco's Next-Generation Firewalls (NGFW) and the Cisco Adaptive Security Appliance (ASA). Candidates must understand how to configure access control policies, network address translation (NAT), and basic firewall features. The exam also covers more advanced NGFW capabilities, such as application visibility and control (AVC) and URL filtering.
Another critical area within this domain is Intrusion Prevention Systems (IPS). Candidates need to be familiar with the functionality of both network-based IPS (NIPS) and host-based IPS (HIPS), understanding how they use signature-based and policy-based detection to identify and block malicious traffic. The curriculum covers the implementation of Cisco's Next-Generation IPS (NGIPS) and the Firepower platform. This includes tuning IPS policies to reduce false positives and ensuring that the system can effectively protect against known and emerging threats without disrupting legitimate network traffic.
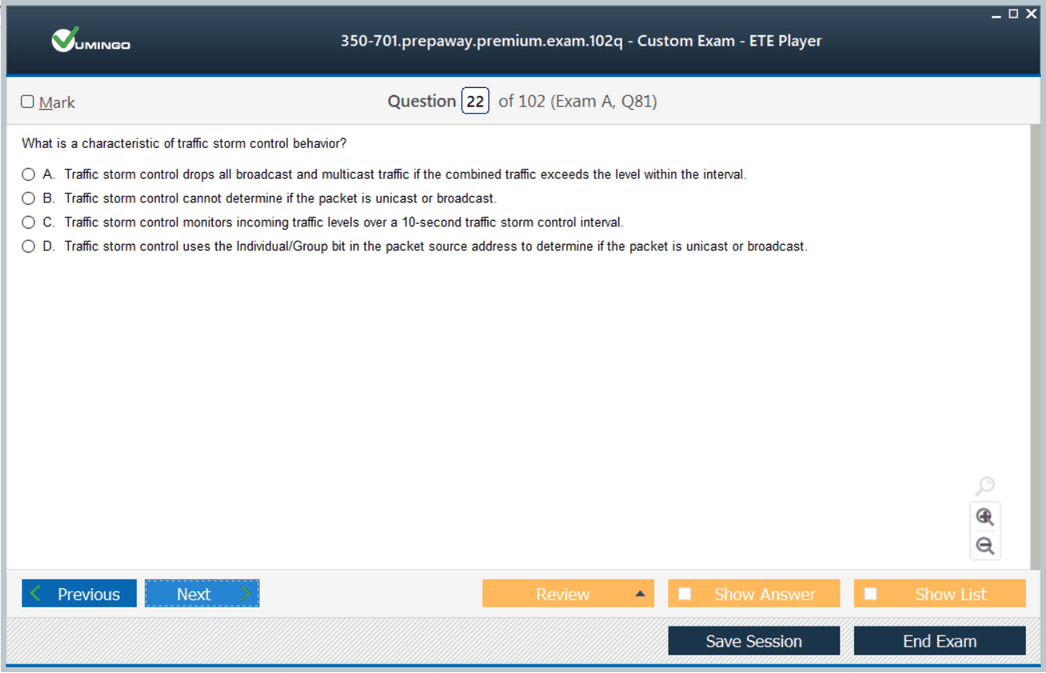
This domain also extends to securing the routing and switching infrastructure. This involves implementing control plane policing to protect the device's CPU, as well as configuring features like DHCP snooping and dynamic ARP inspection to prevent common Layer 2 attacks. Understanding how to secure routing protocols like OSPF and EIGRP through authentication is also a key requirement. Finally, the domain touches upon the implementation of site-to-site VPNs using IPsec to securely connect different office locations over the internet, a fundamental skill for any network security engineer.
Exam Domain 3: Securing the Cloud
As organizations increasingly migrate their applications and data to the cloud, securing these environments has become a top priority. The Securing the Cloud domain of the SCOR exam addresses this modern challenge. It tests the candidate's understanding of different cloud deployment models, including Infrastructure as a Service (IaaS), Platform as a Service (PaaS), and Software as a Service (SaaS). It also covers the security implications of public, private, and hybrid cloud environments, emphasizing the shared responsibility model where both the cloud provider and the customer have security obligations.
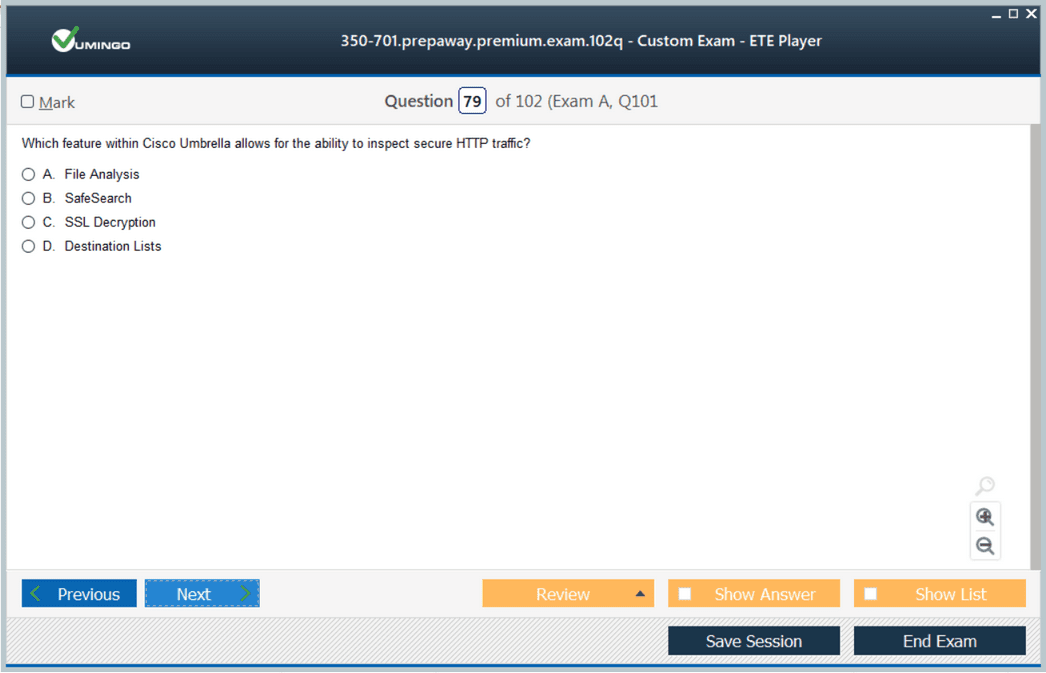
The curriculum explores various cloud security controls and solutions. This includes understanding how to protect cloud-based applications and workloads using virtual firewalls and other security virtual appliances. A key focus is on Cisco's cloud security portfolio, which includes products designed to provide visibility and threat protection for cloud users and applications. This might involve learning about technologies like Cisco Umbrella for DNS-layer security and Cisco Cloudlock, a Cloud Access Security Broker (CASB) that helps enforce security policies for cloud-based applications like Office 365 and Google Workspace.
Candidates are also expected to understand the concepts of application and workload security within a cloud context. This involves securing containers and implementing micro-segmentation to control east-west traffic flow between virtual machines or containers within a cloud data center. The domain requires a conceptual understanding of how to extend an organization's security posture into the cloud, ensuring that consistent policies are applied regardless of where the data and applications reside. This knowledge is essential for professionals working in today's hybrid IT environments.
Exam Domain 4: Content Security
The Content Security domain focuses on protecting users from threats that are delivered via web and email traffic. These are two of the most common vectors for malware infections and phishing attacks, making this a critical area of network security. The exam covers the technologies and strategies used to inspect and filter this content to block malicious payloads and enforce acceptable use policies. A major part of this domain is dedicated to web security and the role of web security appliances or secure web gateways.
Candidates will need to understand the functionality of a web proxy and how it can be used to control user access to the internet. The curriculum covers Cisco's Web Security Appliance (WSA), detailing its features for URL filtering, malware scanning, and application control. This includes configuring policies to block access to malicious or inappropriate websites and inspecting SSL/TLS encrypted traffic to prevent threats from hiding within secure connections. The goal is to provide safe and productive web access for all users within the organization.
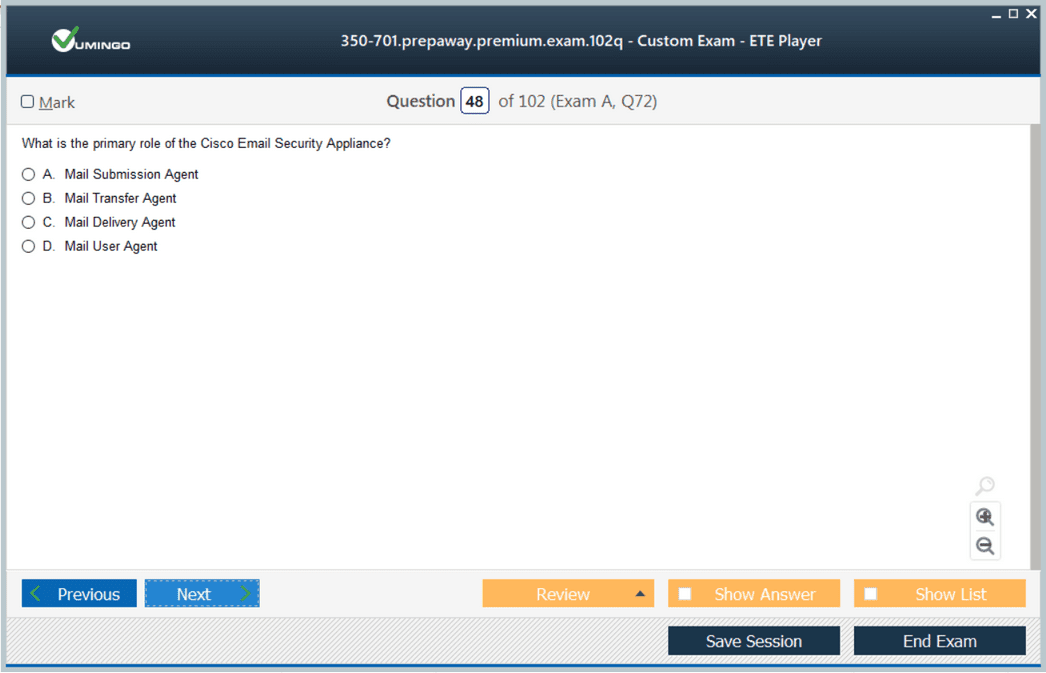
Similarly, the domain covers email security in depth. Candidates must understand the various threats associated with email, such as spam, phishing, and malware-laden attachments. The exam tests knowledge of Cisco's Email Security Appliance (ESA), which provides a multi-layered defense against these threats. This includes features like anti-spam and anti-virus filtering, outbreak filters to stop emerging threats, and data loss prevention (DLP) to prevent sensitive information from being sent out of the organization via email. Securing these content vectors is a cornerstone of a comprehensive security strategy.
Exam Domain 5: Endpoint Protection and Detection
While network-based security controls are essential, they are not always sufficient. The Endpoint Protection and Detection domain addresses the critical need to secure the individual devices, or endpoints, that connect to the network, such as laptops, servers, and mobile phones. These devices are often the ultimate target of an attack and can be a weak link in the security chain. This section of the exam covers the evolution from traditional antivirus software to more advanced endpoint security solutions.
The curriculum focuses on modern Endpoint Protection Platforms (EPP) and Endpoint Detection and Response (EDR) technologies. EPP solutions aim to prevent malware infections using a variety of techniques, including signature-based detection, behavioral analysis, and machine learning. EDR solutions, on the other hand, are focused on detecting and responding to threats that manage to bypass preventative controls. They provide deep visibility into endpoint activity and allow security analysts to investigate and remediate threats.
Cisco's solution in this space is Advanced Malware Protection (AMP) for Endpoints. Candidates for the CCNP Security certification are expected to understand the architecture and capabilities of AMP. This includes its ability to continuously monitor file activity, perform retrospective analysis to identify threats that were not initially detected, and provide tools for threat hunting and incident response. Securing the endpoint is a crucial last line of defense, and this domain ensures that professionals are equipped with the knowledge to manage these advanced solutions effectively.
Exam Domain 6: Secure Network Access, Visibility, and Enforcement
The final domain of the SCOR exam ties many of the other concepts together by focusing on how to control access to the network and maintain visibility into user and device activity. A central theme of this section is the concept of AAA, which stands for Authentication, Authorization, and Accounting. Candidates must understand how protocols like RADIUS and TACACS+ are used to provide centralized authentication for network devices and users, ensuring that only legitimate individuals can access network resources.
This domain places a heavy emphasis on Cisco's Identity Services Engine (ISE). ISE is a powerful policy enforcement platform that serves as the cornerstone of Cisco's Zero Trust and secure access solutions. Candidates need to understand the architecture of ISE and how it can be used to implement granular access control policies. This includes knowledge of 802.1X for port-based network access control, as well as capabilities for guest access management, device profiling to identify the types of devices connecting to the network, and posture assessment to ensure endpoints are compliant with security policies.
Finally, the domain covers the importance of network visibility. To secure a network effectively, you must first be able to see what is happening on it. The exam touches on technologies like NetFlow, which provides valuable information about traffic patterns and can be used for security monitoring and anomaly detection. Understanding how to leverage these visibility tools, in conjunction with an enforcement platform like ISE, allows a CCNP Security professional to build a truly intelligent and responsive security architecture that can adapt to changing conditions and threats.
The Role of Concentration Exams
After successfully passing the foundational SCOR 350-701 core exam, the next step towards achieving the full CCNP Security certification is to pass one of six concentration exams. These exams are designed to allow professionals to specialize in a specific area of security technology that aligns with their career goals, job responsibilities, or interests. While the core exam provides a broad understanding across the entire security spectrum, the concentration exams offer a deep dive into a single product or solution set, validating expert-level skills in that particular domain. This structure allows for a customized certification path.
Choosing the right concentration exam is a critical decision. The choice should be guided by the technologies you work with daily or the area of security you wish to move into. For example, an engineer who primarily manages firewalls would benefit most from the Firepower exam, while someone responsible for network access control would be better suited for the Identity Services Engine exam. Each exam focuses on a specific Cisco security product, covering its architecture, implementation, advanced configuration, and troubleshooting in minute detail. Passing one of these exams demonstrates a high level of proficiency and practical expertise.
This specialization is highly valued by employers. It shows that a candidate not only has a general understanding of security principles but has also mastered a specific, business-critical technology. It proves they can handle complex deployments and troubleshoot challenging issues related to that solution. The six available options cover the most important areas of modern network security, from firewalls and VPNs to email security and automation, ensuring there is a relevant path for nearly every security professional working within a Cisco environment.
SNCF 300-710: Securing Networks with Cisco Firepower
The SNCF 300-710 exam, focusing on Cisco Firepower, is one of the most popular concentration choices. This is because firewalls are a fundamental component of nearly every network security architecture. This exam is designed for security professionals who are responsible for the implementation and management of Cisco's Next-Generation Firewall (NGFW) and Next-Generation Intrusion Prevention System (NGIPS) solutions. It covers the entire Cisco Firepower Threat Defense (FTD) platform, including both the physical appliances and the virtual implementations. A deep understanding of the Firepower architecture, including the Firepower Management Center (FMC), is essential.
Candidates preparing for this exam must master a wide range of topics related to Firepower configuration and policy management. This includes creating and deploying access control policies that incorporate not just traditional IP address and port information, but also application visibility and control (AVC), URL filtering, and user identity. The exam delves deeply into the configuration of the NGIPS, covering how to tune intrusion policies, understand different detection engines, and work with Snort rules to protect against a vast array of network-based attacks.
Furthermore, the SNCF exam covers advanced malware protection and file control policies using Cisco's AMP for Networks technology, which is integrated into the Firepower platform. It also tests skills related to system administration, troubleshooting, and reporting using the Firepower Management Center. This includes tasks like performing backups, monitoring system health, and generating detailed reports on security events and network traffic. Professionals who pass this exam are validated as experts in deploying and operating one of the industry's leading firewall solutions.
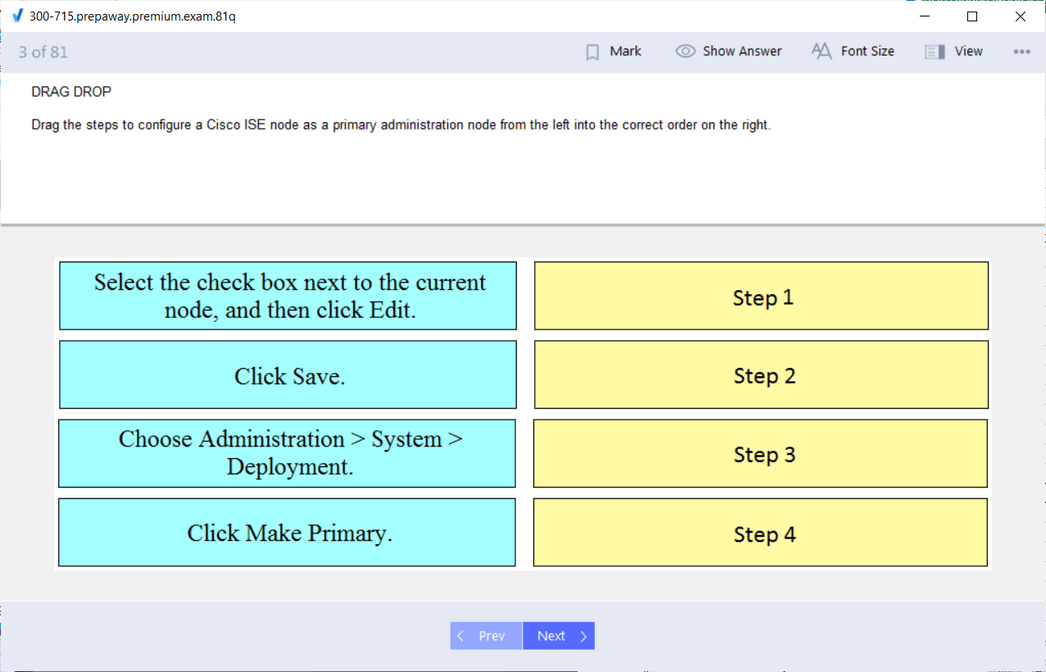
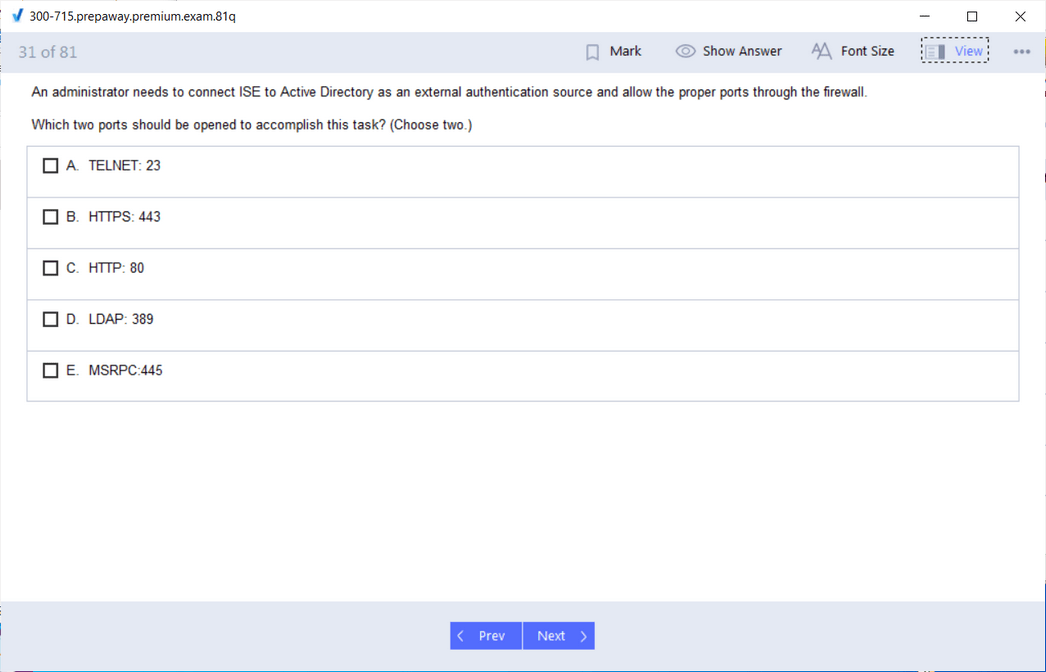
SISE 300-715: Implementing and Configuring Cisco Identity Services Engine
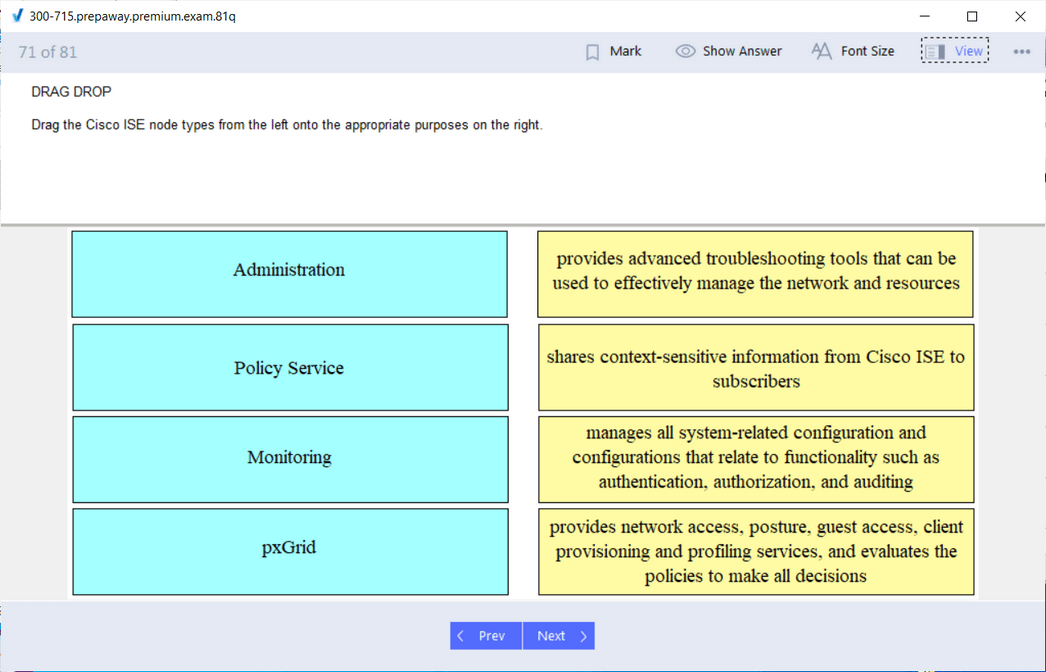
The SISE 300-715 exam is centered on the Cisco Identity Services Engine (ISE), a powerful and complex platform that serves as the central point for network access control and policy enforcement. This concentration is ideal for professionals who design and manage secure access solutions in enterprise environments. ISE is the core component of Cisco's TrustSec architecture and is instrumental in implementing Zero Trust security principles. The exam validates the skills required to deploy and configure ISE for a variety of use cases, from basic device administration access to advanced Bring Your Own Device (BYOD) scenarios.
The curriculum for this exam is extensive, starting with the fundamental architecture and deployment of ISE. Candidates must understand how to set up an ISE deployment, including standalone and distributed environments, and how to configure it for high availability. A major focus is on implementing authentication and authorization policies using protocols like 802.1X and MAC Authentication Bypass (MAB). This involves configuring ISE to communicate with network devices and external identity stores like Active Directory to enforce granular access policies based on user identity, device type, and location.
Beyond basic access control, the SISE exam covers advanced ISE features. This includes configuring guest access services, from simple sponsored guest portals to self-registration workflows. It also covers profiling, which allows ISE to identify and classify endpoints connecting to the network, and posture assessment, which checks endpoints for compliance with security policies before granting access. Passing this exam signifies a deep expertise in controlling who and what can connect to the network, a critical skill for preventing unauthorized access and containing threats.
SESA 300-720: Securing Email with Cisco Email Security Appliance
Email remains one of the most significant attack vectors for organizations, making email security a critical specialization. The SESA 300-720 exam is tailored for security professionals who are responsible for protecting their organizations from email-based threats like spam, phishing, and malware. This exam focuses on the deployment, configuration, and management of the Cisco Email Security Appliance (ESA), both the physical appliance and the cloud-based versions. It covers the full suite of features available on the ESA to build a robust defense against a wide range of email threats.
Candidates for the SESA exam must have a thorough understanding of email protocols like SMTP and how the ESA integrates into an organization's mail flow. The exam covers the configuration of mail policies and the multiple security engines on the appliance. This includes setting up anti-spam and anti-virus scanning, leveraging Cisco's Talos intelligence for outbreak filtering to stop new threats, and configuring advanced malware protection (AMP) to analyze and block malicious file attachments. The goal is to create a multi-layered filtering system that stops threats before they reach end-users' inboxes.
The exam also covers more advanced topics such as data loss prevention (DLP) to prevent sensitive data from leaving the organization via email, and email encryption to secure confidential communications. Candidates will be tested on their ability to troubleshoot common mail flow issues and to use the reporting and tracking features of the ESA to investigate security incidents. A professional with this certification is a validated expert in securing an organization's most critical communication channel.
SWSA 300-725: Securing the Web with Cisco Web Security Appliance
Similar to email, the web is a primary channel for malware delivery and security threats. The SWSA 300-725 exam is designed for professionals who manage secure web access for their organizations. It concentrates on the Cisco Web Security Appliance (WSA), which acts as a secure web gateway to protect users from web-based threats and enforce corporate browsing policies. The exam covers everything from initial deployment and integration to the configuration of advanced security policies and reporting.
A core component of the SWSA curriculum is understanding the different deployment modes of the WSA, such as explicit forward proxy and transparent proxy, and knowing which mode is appropriate for different network environments. Candidates must be proficient in configuring access policies that control which websites users can visit, based on URL categories, user identity, and time of day. The exam also covers the crucial task of decrypting and inspecting SSL/TLS traffic, which is essential for detecting threats hidden within encrypted connections.
Furthermore, the exam tests knowledge of the WSA's advanced security features. This includes integrating with Cisco's Advanced Malware Protection (AMP) to scan downloaded files for malware and using cognitive threat analytics to identify malicious activity. Candidates also need to know how to configure authentication for users and how to generate reports to gain visibility into web usage and potential security risks. Passing this exam demonstrates expertise in providing safe and productive internet access for an entire organization.
SVPN 300-730: Implementing Secure Solutions with Virtual Private Networks
Securing data in transit is a fundamental requirement for any organization, especially with the rise of remote work and branch offices. The SVPN 300-730 exam focuses on the technologies used to create secure Virtual Private Networks (VPNs). This concentration is perfect for network security engineers who design, implement, and troubleshoot VPN solutions. The exam covers a broad range of VPN technologies, validating skills in both site-to-site VPNs for connecting offices and remote access VPNs for individual users.
The exam places a strong emphasis on IPsec, the framework of protocols used to build secure site-to-site VPNs. Candidates must have a deep understanding of Internet Key Exchange (IKEv1 and IKEv2), and how to configure and troubleshoot IPsec tunnels on Cisco IOS routers and ASA firewalls. The curriculum also covers more scalable site-to-site VPN solutions like Cisco's Dynamic Multipoint VPN (DMVPN) and FlexVPN, which are commonly used to connect a large number of branch locations to a central hub.
For remote access, the exam focuses on Cisco's AnyConnect Secure Mobility Client. This includes configuring both SSL VPNs and IKEv2 remote access VPNs on the Cisco ASA and Firepower Threat Defense platforms. Candidates will be tested on their ability to configure authentication, authorization, and accounting for remote users, as well as advanced features like host scanning to check the security posture of the connecting device. A professional who passes the SVPN exam is a certified expert in building and maintaining secure connectivity for a distributed workforce.
SAUTO 300-735: Automating and Programming Cisco Security Solutions
The future of network management and security is automation. The SAUTO 300-735 exam is a unique concentration that caters to the growing need for security professionals with programming and automation skills. This exam is designed for engineers who want to automate security tasks, integrate different security products, and build custom security workflows. It shifts the focus from manual configuration via graphical interfaces or command lines to a more programmatic approach using APIs and scripting.
A fundamental prerequisite for this exam is a solid understanding of Python programming. Candidates are expected to be able to write Python scripts to interact with network devices and security appliances. The curriculum covers the use of REST APIs to programmatically manage Cisco security products like Firepower, ISE, and Umbrella. This involves understanding how to make API calls, parse data formats like JSON and XML, and use this data to automate configuration changes or retrieve security event information.
The exam also explores various automation tools and frameworks. This might include using Ansible for configuration management or interacting with Cisco's DNA Center platform for intent-based networking. The goal is to validate the skills needed to move away from repetitive, manual tasks and towards a more efficient, scalable, and consistent "Infrastructure as Code" model for security operations. Passing the SAUTO exam positions a professional at the cutting edge of network security, ready to tackle the challenges of modern, highly dynamic IT environments.
Developing a Study Plan
Embarking on the CCNP Security certification journey requires a well-structured and disciplined approach to studying. The breadth and depth of the topics covered in both the core SCOR exam and the various concentration exams mean that casual preparation is unlikely to lead to success. The first step for any candidate should be to download the official exam blueprints from the Cisco website. These documents are the definitive source of what will be tested, breaking down each domain and listing the specific knowledge and skills required. A successful study plan should be built directly from these blueprints.
Once you have the blueprint, you can perform a self-assessment to identify your strengths and weaknesses. Professionals with years of hands-on experience with Cisco firewalls may find the network security domain relatively straightforward but might need to dedicate significant time to newer topics like cloud security or automation. Your study plan should allocate more time to your weaker areas. It is also crucial to set a realistic timeline. Depending on your prior experience and daily commitments, preparing for the core exam can take anywhere from three to six months of consistent effort.
A structured schedule is key to maintaining momentum. Dedicate specific hours each week to studying, lab work, and practice exams. Breaking down the vast amount of material into smaller, manageable chunks can make the process less overwhelming. For instance, you could dedicate one week to understanding PKI and cryptography, the next to configuring NGFW policies, and so on. Tracking your progress against the blueprint will ensure you cover all the necessary topics before your scheduled exam date. Consistency is far more effective than cramming.
Choosing Your Learning Method
Candidates have several options when it comes to learning the material for the CCNP Security exams, and the best method often depends on individual learning styles and budgets. One popular approach is self-study. This involves using a combination of resources like official certification guides from Cisco Press, online video courses from training providers, and various technical articles and white papers. The self-study route offers maximum flexibility, allowing you to learn at your own pace and on your own schedule. However, it requires a high degree of self-discipline to stay on track.
Another effective method is instructor-led training. These courses, offered by Cisco Learning Partners, provide a structured classroom environment, either in-person or online. The primary benefit of this approach is having direct access to an experienced instructor who can explain complex topics, answer questions, and provide valuable real-world insights. These courses often come with dedicated lab access and are designed to cover the entire exam curriculum in an intensive, focused format. While this is typically the most expensive option, many find the structured guidance and expert instruction to be a worthwhile investment.
A hybrid approach is often the most effective. This involves using self-study materials like books and videos for the initial learning and then supplementing this with a bootcamp or workshop closer to the exam date to solidify knowledge and clarify any difficult areas. Regardless of the primary method chosen, it is essential to incorporate a variety of resources. Relying on a single book or video series may leave gaps in your understanding, as different instructors and authors often excel at explaining different topics.
The Critical Importance of Hands-On Labs
The CCNP Security exams are not just a test of theoretical knowledge; they are a validation of practical, hands-on skills. It is impossible to pass these exams simply by reading books or watching videos. You must spend a significant amount of time in a lab environment, configuring, troubleshooting, and working with the technologies covered in the exam blueprint. This practical experience is what solidifies theoretical concepts and builds the muscle memory needed to perform tasks efficiently under the pressure of an exam. There is no substitute for hands-on practice.
There are several ways to get the necessary lab experience. For those with the resources, building a physical home lab with used Cisco equipment is an option, though this can be expensive and requires space and power. A more common and flexible approach is to use virtual lab environments. Tools like GNS3, EVE-NG, and Cisco's own Cisco Modeling Labs (CML) allow you to create complex network topologies with virtual routers, switches, and security appliances running on your own computer or a server. These platforms provide an incredibly realistic and powerful environment for practice.
Many online training platforms also offer lab rental services. These services provide remote access to pre-built physical or virtual lab pods that are specifically designed to cover the CCNP Security curriculum. This can be a cost-effective way to get hands-on time with a wide range of devices without the overhead of building and maintaining your own lab. Whatever method you choose, the goal is the same: to move beyond reading about a feature and to actually implement it, break it, fix it, and truly understand how it works.
Understanding the Costs Involved
Pursuing the CCNP Security certification is a significant financial investment as well as a time commitment. It is important to budget for the various costs involved. The most direct costs are the exam fees themselves. The core SCOR 350-701 exam typically costs around $400 USD. Each of the concentration exams usually costs around $300 USD. Therefore, to achieve the full certification by passing one core and one concentration exam, you should expect to spend a minimum of approximately $700 USD on exam vouchers alone. These prices can vary slightly by region and are subject to change.
Beyond the exam fees, the largest potential expense is for training materials and lab access. Official Cisco Press books can cost between $50 and $80 each. A subscription to a reputable video training platform can range from $40 to $100 per month. Instructor-led training courses are the most expensive option, often costing several thousand dollars for a week-long class. Access to virtual lab platforms like Cisco Modeling Labs requires a subscription, which is around $200 per year. Factoring in these training resources, the total cost can easily range from $1,000 to over $5,000.
It is wise to check if your employer offers any support for professional development. Many companies are willing to pay for certifications that are relevant to an employee's job role, as it directly benefits the organization. They may cover the cost of exams, training materials, or even a full instructor-led course. Exploring these options can significantly reduce the personal financial burden. Even if you are paying out of pocket, it is helpful to view the cost as an investment in your career that will likely pay significant dividends in the form of higher salary and better job opportunities.
Prerequisites and Recommended Experience
Officially, Cisco has removed the formal prerequisite of holding a CCNA certification before attempting the CCNP Security exams. This means that, in theory, anyone can register for and take the exams. However, this change in policy does not change the reality of the knowledge required. The CCNP Security curriculum assumes that the candidate already possesses a solid, CCNA-level understanding of networking fundamentals. Topics like IP addressing, subnetting, routing protocols, and switching concepts are considered foundational knowledge and are not taught in the CCNP courses.
Cisco strongly recommends that candidates have between three to five years of hands-on experience working with security solutions and Cisco networking equipment before attempting the certification. This practical experience is invaluable. It provides the real-world context that is often necessary to understand the nuances of the technologies being tested. Candidates who try to jump straight to the CCNP Security without a solid foundation in both networking and practical security operations will find the learning curve to be exceptionally steep and challenging.
The ideal candidate for the CCNP Security is a network or security administrator who has been working in the field for several years. They should be comfortable with the command-line interface of Cisco IOS and have experience with basic firewall and switch configurations. This background provides the necessary framework to build upon. The certification is designed to take professionals with a good operational understanding and elevate them to a level where they can design, implement, and troubleshoot complex security architectures.
Exam Logistics and Format
The CCNP Security exams are administered by Pearson VUE at their authorized testing centers worldwide. You must create an account on the Pearson VUE website to schedule your exam. You can choose a date and time at a testing center near you. In recent years, an online proctored option has also become available, allowing you to take the exam from your home or office, provided your environment meets the strict testing requirements. This offers greater flexibility but requires a reliable internet connection and a quiet, private space.
The SCOR 350-701 core exam is a 120-minute test. The concentration exams are typically 90 minutes long. The exact number of questions can vary, but they usually range from 90 to 110 questions for the core exam and 55 to 65 for the concentration exams. The question formats are diverse and designed to test knowledge in different ways. You can expect to see multiple-choice questions (with a single correct answer), multiple-response questions (with several correct answers), and drag-and-drop questions for matching or sequencing items.
It is important to note that Cisco exams do not allow you to go back to previous questions. Once you answer a question and move on, you cannot return to review or change your answer. This means you must be confident in your choice before proceeding. Time management is critical. It is wise to keep an eye on the clock and not spend too much time on any single question. If you are unsure about an answer, it is often best to make an educated guess and move on to ensure you have time to attempt all the questions.
Certification Validity and Recertification
Once you have successfully passed both the core exam and a concentration exam, you will be awarded the CCNP Security certification. This certification is valid for a period of three years from the date it is earned. The three-year validity period reflects the rapid pace of change in the technology industry. It ensures that certified professionals stay current with the latest security threats, technologies, and best practices. To maintain your status as a certified professional, you must meet the recertification requirements before your certification expires.
There are several pathways to recertify. The traditional method is to pass another exam. For example, you could pass another CCNP concentration exam, either from the security track or another track, or you could pass the core exam again. Passing any single professional-level exam will recertify all of your professional-level certifications. Alternatively, for those aiming higher, passing the CCIE lab exam will also recertify all lower-level certifications.
Cisco has also introduced a more flexible recertification option through its Continuing Education (CE) program. This allows professionals to earn credits by completing various approved activities. These activities can include attending Cisco Live training sessions, completing online training courses, writing relevant content, or participating in other forms of professional development. To recertify the CCNP Security, you must earn 80 CE credits within the three-year period. This program provides a valuable alternative for those who wish to maintain their certification through continuous learning rather than by taking another high-stakes exam.
Final Verdict:
After a comprehensive review of the certification's curriculum, career prospects, and industry standing, the answer is an unequivocal yes. The CCNP Security certification is absolutely worth the significant investment of time, effort, and money. In an era where cybersecurity is a top priority for every organization, the demand for professionals with proven, advanced security skills is at an all-time high. This certification provides a clear and respected validation of those skills, making you a highly attractive candidate to employers.
The journey to certification is challenging, but the knowledge and practical skills you acquire are invaluable. You will develop a deep and comprehensive understanding of how to secure modern networks using industry-leading technologies. This expertise not only enhances your ability to perform in your current role but also equips you for career advancement and higher earning potential. It demonstrates a level of dedication and proficiency that sets you apart in a crowded field.
In conclusion, for any IT professional serious about building a long and successful career in network security, the CCNP Security certification is a benchmark achievement. It provides the technical depth, practical skills, and industry recognition needed to tackle complex security challenges and to thrive in the dynamic and ever-important world of cybersecurity. It is a powerful investment in your professional future.
CCNP Security certification practice test questions and answers, training course, study guide are uploaded in ETE files format by real users. Study and pass Cisco CCNP Security certification exam dumps & practice test questions and answers are the best available resource to help students pass at the first attempt.


