

PL-100: Microsoft Power Platform App Maker Certification Video Training Course
The complete solution to prepare for for your exam with PL-100: Microsoft Power Platform App Maker certification video training course. The PL-100: Microsoft Power Platform App Maker certification video training course contains a complete set of videos that will provide you with thorough knowledge to understand the key concepts. Top notch prep including Microsoft Power Platform PL-100 exam dumps, study guide & practice test questions and answers.
PL-100: Microsoft Power Platform App Maker Certification Video Training Course Exam Curriculum

Introduction
Installing Power Apps and Environments
Creating a canvas app from a template, and creating one from scratch
Introduction
-
5:00
 1. Introduction to the Power Platform
Installing Power Apps and Environments
-
6:00
1. Licensing for Power Apps
-
3:00
2. Signing up for Power Apps per user plan
-
2:00
3. Signing up for Power Apps Developer Plan
-
7:00
4. Why do I need a Work email address? And how can I get one, if I don't have it?
-
7:00
5. Different types of environments, and creation options
-
9:00
6. Create a Common Data Service database, and sample data
Creating a canvas app from a template, and creating one from scratch
-
7:00
1. 34. Creating a canvas app using a template; understand how to start building app
-
3:00
2. Saving my Power App
-
2:00
3. 34, 35. Connect to data sources in canvas apps
-
5:00
4. 36. Build canvas apps screens - Inserting a Gallery
-
9:00
5. Formatting the label component
-
5:00
6. Practice Activity Number 1 - The Solution
About PL-100: Microsoft Power Platform App Maker Certification Video Training Course
PL-100: Microsoft Power Platform App Maker certification video training course by prepaway along with practice test questions and answers, study guide and exam dumps provides the ultimate training package to help you pass.
PL-100 Exam Prep: Microsoft Power Platform App Maker
The PL-100 Microsoft Power Platform App Maker course is designed for individuals who want to learn how to build business solutions with the Power Platform. The exam validates skills in designing, creating, and deploying solutions that simplify business processes. This training course provides a complete journey from fundamentals to advanced knowledge, ensuring candidates are prepared for both the certification exam and real-world solution building.
This course is structured into five major parts. Each part covers different aspects of the exam and builds step by step toward a deep understanding of app making with Microsoft Power Platform. By the end of the course, you will have confidence not only to pass the exam but also to apply these skills in professional projects.
Course Overview
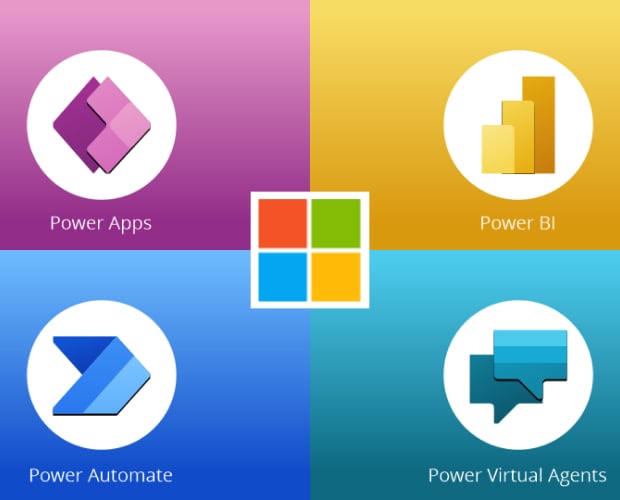
The Power Platform consists of Power Apps, Power Automate, Power BI, and Power Virtual Agents. Together they allow organizations to analyze data, build applications, automate workflows, and engage with users in new ways.
The PL-100 exam focuses on the role of an App Maker. An App Maker uses these tools to solve business problems without necessarily having advanced coding skills. The exam emphasizes low-code and no-code solutions, business logic, data modeling, process automation, and the ability to create user-friendly applications.
This course will provide a thorough exploration of each of these topics. We will study real-world business use cases and practice building solutions step by step.
Who This Course Is For
This course is for individuals who want to develop solutions with Microsoft Power Platform and pursue the PL-100 certification. It is ideal for business users, analysts, and professionals who have ideas for improving processes but may not come from a programming background.
It is also suitable for IT professionals who want to expand their skills into low-code app development. Managers and team leads who want to understand the potential of the Power Platform for digital transformation will also benefit.
If you have a passion for problem-solving, innovation, and creating applications that improve efficiency, this course is designed for you.
Course Requirements
There are no strict technical prerequisites to start this course. However, familiarity with Microsoft 365 applications such as Excel, SharePoint, or Teams can make the learning process smoother.
Having some understanding of databases, cloud computing, and data analysis concepts will also help. But even if you are completely new, the course is structured to take you from foundational knowledge to advanced app building techniques.
What you need most is a willingness to learn, explore, and practice. Access to a Power Platform environment is highly recommended so that you can follow the exercises and build your own solutions.
Learning Objectives
By the end of this course, you will be able to design solutions with Microsoft Power Platform, model business data, build apps using Power Apps, automate processes with Power Automate, analyze insights with Power BI, and engage users with chatbots using Power Virtual Agents.
You will also gain the ability to work with Dataverse, integrate data from multiple sources, apply security best practices, and test and deploy applications effectively.
These skills will not only prepare you for the PL-100 exam but also empower you to contribute significantly to your organization’s digital innovation initiatives.
The Role of an App Maker
An App Maker is a problem solver. This role is about understanding the needs of a business and translating them into applications and processes that improve outcomes.
The App Maker uses low-code tools provided by Microsoft Power Platform to build applications that are accessible, functional, and scalable. Unlike traditional developers, App Makers focus more on business needs and less on coding.
In many organizations, App Makers bridge the gap between IT and business teams. They bring ideas to life quickly, enabling digital transformation in a more agile way.
Overview of the PL-100 Exam
The PL-100 exam evaluates your ability to design and create solutions using Microsoft Power Platform. It measures skills in identifying business requirements, creating data models, building apps, automating workflows, and analyzing data.
The exam consists of multiple-choice questions, case studies, and scenario-based tasks. It requires not just theoretical knowledge but also practical skills. You will be expected to understand how to apply concepts in real situations.
Passing the exam demonstrates that you are capable of building impactful business solutions using the Power Platform. It is a valuable certification for career growth and recognition.
Understanding Microsoft Power Platform
The Microsoft Power Platform is a suite of applications that empower business users to innovate. At its core are Power Apps, Power Automate, Power BI, and Power Virtual Agents. These tools are connected by Microsoft Dataverse, a data platform that enables integration and storage of business data.
Power Apps allows you to build custom apps without writing traditional code. Power Automate lets you automate repetitive processes and workflows. Power BI provides tools to analyze and visualize data. Power Virtual Agents enables you to create chatbots that interact with users and customers.
Together, these components create an environment where business users can create end-to-end solutions.
Importance of Power Platform in Modern Business
Organizations today face the challenge of adapting quickly to new demands. Digital transformation is no longer optional but essential. Power Platform gives companies the ability to respond rapidly by enabling users to build apps and automate processes without waiting for lengthy development cycles.
This democratization of app development empowers business users to take control of innovation. It reduces the burden on IT departments and accelerates the pace of change. For this reason, professionals who can use the Power Platform effectively are in high demand.
Getting Started with the Course
The first part of this training focuses on building the foundation. We will explore the core components of the Power Platform, understand the role of an App Maker, and review how the PL-100 exam is structured.
Subsequent parts will take you deeper into each area. You will practice creating applications, automating workflows, working with data, and deploying complete solutions. Each section is designed to prepare you for real scenarios and exam challenges.
Structure of the Training
This training is divided into five major parts. The first part introduces the exam, the role of an App Maker, and the fundamentals of the Power Platform. The second part focuses on Power Apps. The third part covers Power Automate and workflows. The fourth part explores Power BI and data visualization. The fifth part brings everything together with integration, deployment, and exam preparation.
Each part will have in-depth explanations, examples, and exercises. By following along, you will gradually build the knowledge and confidence required to succeed.
Foundation of Low-Code Development
The Power Platform is built on the principle of low-code development. This approach allows users to create apps and workflows visually, using drag-and-drop interfaces, predefined templates, and configurable components.
Low-code does not mean limited capability. With Power Platform, you can connect to hundreds of data sources, apply business logic, create responsive designs, and integrate with advanced tools. It gives both non-developers and developers a common environment to innovate.
Dataverse as the Core Data Platform
At the heart of Power Platform lies Dataverse. It provides secure and scalable data storage for apps and processes. Dataverse organizes data into tables and relationships, making it easier to model business information.
It also integrates seamlessly with Microsoft 365, Dynamics 365, Azure, and third-party services. Understanding Dataverse is crucial for App Makers because it allows consistent data management across applications.
Preparing Your Learning Environment
Before starting hands-on practice, you should set up a Power Platform environment. Microsoft provides a developer plan that gives you free access to Power Apps, Power Automate, and Dataverse.
Setting up your environment ensures you can experiment safely without affecting production systems. It also gives you a chance to apply concepts immediately as you learn.
The Path to Certification
Achieving PL-100 certification requires dedication and practice. This training provides the roadmap. By studying the course, practicing with real scenarios, and reviewing exam objectives, you can reach the goal with confidence.
Certification is not just about passing an exam. It is about gaining skills that add value to your career and your organization. The PL-100 credential shows that you are capable of driving innovation with Microsoft Power Platform.
Introduction to Power Apps
Power Apps is the centerpiece of Microsoft Power Platform. It enables you to create custom business applications without writing extensive code. With its low-code environment, users can build apps that are functional, responsive, and integrated with data sources. Understanding Power Apps is crucial for anyone preparing for the PL-100 exam.
Power Apps allows organizations to solve business problems quickly. Instead of waiting for traditional development teams to deliver a solution, business users can design their own apps tailored to specific needs. These apps can be used on desktops, tablets, and mobile devices, ensuring flexibility across platforms.
Types of Power Apps
There are three main types of Power Apps that an App Maker should master. The first type is Canvas Apps. These apps give you full control over design. You can arrange elements freely, much like designing a slide in PowerPoint. This flexibility allows you to create highly customized user interfaces.
The second type is Model-Driven Apps. These apps are built on top of Dataverse. They focus on business logic and data rather than design. Model-driven apps automatically generate responsive layouts based on the underlying data model, making them ideal for structured business processes.
The third type is Portals, also known as Power Pages. These are websites that can be shared with external users such as customers or partners. Portals provide a way to extend your apps beyond your organization, enabling collaboration and communication with external audiences.
Choosing the Right Type of App
Selecting the correct type of app is important. If your focus is on user experience and design, a Canvas App may be the best choice. If you need to build apps that are driven by complex business logic and rely on structured data, Model-Driven Apps are more suitable.
For organizations that need to interact with customers, suppliers, or partners, Portals provide a secure and scalable solution. As an App Maker, part of your responsibility is to evaluate requirements and decide which app type will best achieve the business goals.
Power Apps Studio
Power Apps Studio is the environment where you build and customize apps. It provides a drag-and-drop interface, similar to designing a slide deck. You can add controls, text, images, and logic without coding.
The Studio also allows you to connect data sources, define variables, and apply formulas. These formulas are similar to those used in Excel, making it easier for business users to adapt. By mastering Power Apps Studio, you can create powerful applications without needing to be a developer.
Connecting to Data Sources
One of the greatest strengths of Power Apps is its ability to connect to hundreds of data sources. Using connectors, you can integrate apps with services such as SharePoint, SQL Server, Microsoft 365, Dynamics 365, and many third-party systems.
There are two types of connectors. Standard connectors are available by default and include popular services such as Excel, OneDrive, and Outlook. Premium connectors provide access to advanced systems like Salesforce, Azure SQL, and SAP. Choosing the right connector ensures smooth data integration.
Introduction to Dataverse
Dataverse is the native data platform for Power Apps. It stores data in tables and relationships, providing a structured way to manage business information. With Dataverse, you can enforce business rules, apply security, and integrate with other Microsoft services.
For Model-Driven Apps, Dataverse is essential. It ensures that data is consistent, secure, and scalable. Understanding Dataverse is a key exam objective, and hands-on practice with it will give you confidence in building data-driven apps.
Building a Canvas App
The process of building a Canvas App starts with defining the purpose of the app. You begin by choosing a data source or a blank layout. Once the base is set, you add screens, controls, and navigation.
For example, you can create a sales tracking app connected to an Excel sheet or SharePoint list. You can design a home screen that shows sales performance, add forms for entering new opportunities, and include navigation for reports. Canvas Apps allow you to bring creativity into app design.
Using Formulas in Power Apps
Formulas are the logic behind Power Apps. They work similarly to Excel formulas and are used to control behavior, manage data, and add interactivity. For instance, you can use formulas to filter records, update data, or navigate between screens.
Learning formulas is essential for becoming an effective App Maker. While Power Apps is a low-code platform, formulas bring flexibility and power. The more you practice, the more you will be able to create apps that solve complex problems.
Building a Model-Driven App
Model-Driven Apps rely on Dataverse for structure. Instead of designing every screen manually, the app generates layouts based on tables and relationships. This approach ensures consistency and responsiveness.
To build a Model-Driven App, you start by defining a data model. You create tables, set up relationships, and configure forms and views. The app then provides navigation, charts, and dashboards automatically. This makes Model-Driven Apps ideal for scenarios such as case management, service requests, or sales tracking.
Customizing Model-Driven Apps
Although Model-Driven Apps generate layouts automatically, you can still customize them. You can design forms to capture specific fields, create custom views for different roles, and add dashboards to provide insights.
You can also apply business rules and process flows. Business rules enforce conditions such as mandatory fields or default values. Process flows guide users through steps, ensuring compliance with business procedures. Together, these tools make Model-Driven Apps powerful and reliable.
Creating Portals with Power Pages
Power Pages, formerly known as Power Apps Portals, allow you to build external-facing websites. These sites can provide services to customers, partners, or vendors.
For example, a company can create a portal where customers log in to check order status, submit requests, or interact with support. Power Pages integrate with Dataverse, ensuring that data is managed centrally. As an App Maker, knowing how to design portals helps you extend the reach of your solutions.
User Experience in Power Apps
User experience is a key aspect of building successful apps. Apps should be easy to navigate, responsive across devices, and visually appealing. Power Apps allows you to customize layouts, use themes, and apply responsive design principles.
When designing apps, think about the user journey. Keep navigation simple, avoid clutter, and ensure that key actions are easy to access. A well-designed app improves adoption and delivers greater value to the organization.
Security in Power Apps
Security is critical when building apps. Power Apps uses role-based security to control access to data and functions. Dataverse allows you to define security roles, field-level security, and record-level permissions.
For example, a sales app might allow managers to see all records while sales representatives only see their own data. Security ensures compliance with organizational policies and protects sensitive information. Understanding security is a vital part of preparing for the PL-100 exam.
Publishing and Sharing Apps
Once an app is built, it needs to be published and shared. Power Apps provides options for publishing apps to users within the organization. You can share apps with specific individuals, security groups, or everyone in the company.
Apps can also be embedded into Microsoft Teams, SharePoint, or websites. This integration increases accessibility and ensures that apps fit naturally into daily workflows.
Testing and Debugging Apps
Testing is an important step before deploying apps. Power Apps Studio provides tools to preview apps, check for errors, and debug logic. You can simulate different user roles and test on different devices.
Debugging formulas and data connections helps ensure the app runs smoothly. By thoroughly testing apps, you reduce issues after deployment and build trust with users.
Advanced Features in Power Apps
Beyond the basics, Power Apps offers advanced features. You can use AI Builder to integrate artificial intelligence into your apps, such as form processing, prediction models, or object detection.
You can also integrate Power Apps with Power Automate to create end-to-end solutions. For example, a form submission in Power Apps can trigger an automated approval workflow. These integrations expand the possibilities of what you can build.
The Importance of Governance
As organizations adopt Power Apps, governance becomes critical. Governance involves setting policies, monitoring usage, and ensuring compliance. Administrators can manage environments, monitor data connections, and enforce security standards.
App Makers play a role in governance by following best practices. This includes using appropriate connectors, documenting logic, and ensuring apps meet organizational requirements. Strong governance ensures that apps remain secure, reliable, and aligned with business goals.
Preparing for Power Apps in the Exam
The PL-100 exam places significant weight on Power Apps. Candidates are expected to demonstrate the ability to design, build, and customize both Canvas and Model-Driven Apps. You will also be tested on integrating data sources, applying business rules, and creating user-friendly experiences.
Hands-on practice is the best way to prepare. Build sample apps, experiment with formulas, and explore Dataverse. The more experience you gain, the more confident you will feel in the exam.
Real-World Use Cases of Power Apps
Power Apps is used across industries. In healthcare, apps can track patient data and streamline appointments. In retail, apps manage inventory and sales. In education, apps support student engagement and course management.
These real-world applications demonstrate the versatility of Power Apps. As an App Maker, you can create solutions that directly impact efficiency, customer satisfaction, and decision-making.
The Future of Power Apps
Microsoft continues to invest heavily in Power Apps and the broader Power Platform. New features are regularly introduced, including enhanced AI capabilities, improved connectors, and better integration with Microsoft 365.
For App Makers, this means opportunities will continue to grow. Mastering Power Apps today positions you for success in the evolving world of digital transformation.
Introduction to Power Automate
Power Automate is the automation engine of Microsoft Power Platform. It allows you to automate repetitive tasks, streamline processes, and connect systems together. With Power Automate, you can create flows that move data, send notifications, or trigger actions without manual effort. Learning Power Automate is essential for the PL-100 exam because it demonstrates your ability to design end-to-end solutions.
Understanding the Concept of Flows
In Power Automate, automated processes are called flows. A flow is a sequence of steps that executes when certain conditions are met. Flows can range from simple actions, such as sending an email when a new file is uploaded, to complex workflows involving approvals, conditions, and integrations across multiple systems.
Types of Flows
There are several types of flows in Power Automate. Automated flows are triggered by events, such as when a new item is created in SharePoint or when an email arrives in Outlook. Instant flows are triggered manually, often through a button click in Power Apps or Teams. Scheduled flows run at predefined times, making them useful for routine tasks such as daily reporting. Business process flows guide users through stages of a business process, ensuring that steps are followed consistently. Desktop flows are used for robotic process automation, allowing automation of tasks on local machines or legacy systems.
Choosing the Right Flow
Selecting the correct flow type depends on the business requirement. If the goal is to react to an event, an automated flow is appropriate. If users need to trigger a process on demand, an instant flow works best. For tasks that happen at specific intervals, scheduled flows are the right choice. Business process flows are ideal when consistency and compliance are required. Desktop flows are necessary when working with systems that lack modern APIs.
Building an Automated Flow
Creating an automated flow begins by defining the trigger. A trigger is the event that starts the flow. After the trigger, actions are added to perform tasks such as updating records, sending notifications, or creating files.
For example, you can build a flow that starts when a new lead is added in Dynamics 365. The flow can send an email to the sales manager, create a task in Planner, and post a message in Teams. This automation saves time and ensures that no leads are overlooked.
Connectors in Power Automate
Connectors are the building blocks of Power Automate. They enable integration with hundreds of services and applications. Standard connectors include popular services like SharePoint, Outlook, and OneDrive. Premium connectors include advanced systems such as Salesforce, Azure SQL, and ServiceNow.
Understanding connectors is vital for the exam because they determine what data and services you can automate. Choosing the right connector ensures smooth workflows and reduces complexity.
Triggers and Actions
Every flow starts with a trigger. Triggers listen for events and start the flow when conditions are met. After the trigger, the flow executes actions. Actions are tasks that the flow performs, such as sending an email, updating a record, or calling an API.
For instance, a flow might trigger when a new file is uploaded to OneDrive. The actions could include sending a notification, copying the file to SharePoint, and logging the event in a database. The combination of triggers and actions makes automation flexible and powerful.
Conditions and Branching
Flows often require decision-making. Conditions allow flows to branch based on logic. If a condition is true, one path is followed. If it is false, another path is executed.
For example, an approval flow might check whether a purchase amount is greater than a threshold. If it is, the flow sends approval to a manager. If not, it processes the purchase automatically. Conditions add intelligence to flows and ensure that automation reflects business rules.
Using Loops in Flows
Loops allow flows to repeat actions for multiple items. The two main types are Apply to Each and Do Until. Apply to Each repeats actions for every item in a collection. Do Until repeats actions until a condition is met.
Loops are useful for scenarios such as processing multiple files, updating records, or sending notifications to groups. They ensure that flows can handle dynamic data and scale effectively.
Approval Processes in Power Automate
One of the most common uses of Power Automate is managing approvals. Approval flows allow organizations to streamline decision-making. An approval can be requested when a new item is submitted, a purchase is made, or a document is uploaded.
Approvers receive notifications in Outlook or Teams. They can approve or reject directly from the notification. The flow then takes action based on the response. Approval flows reduce delays and provide an audit trail for decisions.
Business Process Flows
Business process flows are a special type of flow that guide users through stages of a business process. They are particularly valuable in scenarios where consistency and compliance are critical.
For example, a sales process may include stages such as lead qualification, opportunity development, proposal, and closure. A business process flow ensures that users follow these steps in order. This enforces best practices and improves process reliability.
Robotic Process Automation with Desktop Flows
Desktop flows extend automation to tasks that cannot be automated through connectors. Using robotic process automation, desktop flows can record actions on a computer, such as clicking buttons or entering data in legacy systems.
These flows are useful for scenarios where systems lack APIs or integration options. Although they are more complex, they allow organizations to automate processes that would otherwise remain manual.
Power Automate and Power Apps Integration
Power Automate integrates seamlessly with Power Apps. App Makers can add buttons to apps that trigger flows. This integration allows apps to perform tasks beyond their built-in capabilities.
For instance, a Canvas App can include a button that triggers a flow to send approval requests, update records in multiple systems, or generate reports. Integration between Power Apps and Power Automate expands the scope of what App Makers can build.
Error Handling in Flows
Error handling is an important part of building reliable flows. Power Automate provides options to configure actions when errors occur. You can set actions to retry, ignore, or run alternative paths if an error is detected.
Error handling ensures that flows do not fail silently. For example, if a flow cannot update a record, it can log the error and notify the user. This makes flows more robust and dependable.
Monitoring and Managing Flows
Once flows are built, they need to be monitored. Power Automate provides dashboards that show flow runs, successes, and failures. You can check performance, view error messages, and optimize flows.
Administrators can manage flows across the organization, control usage, and ensure compliance. Monitoring is critical to maintain reliability and improve efficiency over time.
Security in Power Automate
Security is essential when automating business processes. Power Automate uses the security settings of the underlying systems. Users must have appropriate permissions to access data and perform actions.
Dataverse provides additional security options, including role-based access control. As an App Maker, you must ensure that flows respect organizational policies and protect sensitive information.
Advanced Features in Power Automate
Power Automate offers advanced features for complex scenarios. You can call custom APIs, use Azure Logic Apps, or integrate with AI Builder for intelligent automation. AI Builder allows flows to perform tasks such as form recognition, prediction, or sentiment analysis.
Advanced features expand the possibilities of automation. They allow organizations to move beyond simple workflows and build sophisticated solutions that provide real business value.
Governance and Best Practices
Governance is important in large organizations where many flows are created. Best practices include naming conventions, documentation, version control, and monitoring. Following these practices ensures that flows remain manageable and understandable.
Administrators can establish data loss prevention policies, monitor usage, and enforce standards. As an App Maker, contributing to governance strengthens the overall effectiveness of the Power Platform.
Preparing for Power Automate in the Exam
The PL-100 exam includes significant content on Power Automate. You will be tested on your ability to design flows, select triggers and actions, use conditions, create approval processes, and integrate with Power Apps.
Hands-on practice is the most effective preparation. Build sample flows that connect different systems, automate approvals, and process data. By working with real scenarios, you develop the practical knowledge required to succeed.
Real-World Applications of Power Automate
Power Automate is used across industries to improve efficiency. In finance, it automates invoice approvals. In human resources, it manages onboarding workflows. In healthcare, it processes patient data and notifications.
These applications show how automation reduces manual effort, saves time, and improves accuracy. As an App Maker, mastering Power Automate allows you to create solutions that have measurable impact.
The Future of Automation
Automation continues to grow in importance. Organizations are increasingly adopting digital workflows to remain competitive. Microsoft invests heavily in Power Automate, adding new connectors, improving AI capabilities, and enhancing governance tools.
For professionals, this means that skills in Power Automate will remain valuable. By mastering automation today, you prepare for future opportunities in the evolving digital workplace.
Introduction to Power BI
Power BI is the business intelligence tool within Microsoft Power Platform. It allows users to connect to data, transform it into meaningful insights, and present it through interactive dashboards and reports. For App Makers, Power BI is essential because data visualization helps organizations make informed decisions. Understanding Power BI concepts is a key skill for the PL-100 exam.
The Role of Power BI in Power Platform
While Power Apps and Power Automate focus on creating solutions and automating workflows, Power BI focuses on insights. It transforms raw data into visuals that tell a story. These visuals help business users quickly understand performance, identify trends, and act on insights.
Power BI integrates seamlessly with Power Apps and Power Automate. You can embed Power BI dashboards into apps or trigger flows based on insights. This combination ensures that solutions are not only functional but also intelligent.
Power BI Service and Power BI Desktop
There are two main environments in Power BI. Power BI Desktop is the development tool where you design reports. It allows you to connect to data sources, transform data with Power Query, and create visuals. Power BI Service is the cloud platform where you publish, share, and collaborate on reports.
App Makers should be comfortable working in both environments. Reports are usually created in Power BI Desktop and then deployed to Power BI Service for distribution. The exam may test your understanding of this workflow.
Connecting to Data Sources
Power BI connects to a wide variety of data sources. These include Excel, SharePoint, SQL Server, Dynamics 365, Azure services, and third-party systems. Data can be imported into Power BI or connected live for real-time updates.
Understanding how to select and configure data sources is a fundamental skill. In the exam, you may be asked about the differences between importing data and using a direct query connection. Each method has trade-offs in terms of performance, scalability, and refresh options.
Data Transformation with Power Query
Power Query is the tool for preparing data in Power BI. It allows you to clean, reshape, and combine data before using it in reports. Common tasks include removing duplicates, filtering rows, splitting columns, and merging datasets.
App Makers must understand how to use Power Query to prepare data. Clean data ensures that visuals are accurate and reliable. Inconsistent or incomplete data leads to poor decision-making. Practicing Power Query transformations will give you confidence for the exam.
Data Modeling in Power BI
Once data is prepared, it is organized into a data model. A model defines tables, relationships, and calculations. Proper data modeling ensures that visuals display correctly and calculations are accurate.
Relationships are established between tables to link data. For example, a sales table can be related to a products table using a product ID. Measures and calculated columns allow you to create advanced calculations using DAX, the Data Analysis Expressions language in Power BI.
Introduction to DAX
DAX is the formula language used in Power BI. It allows you to create measures, calculated columns, and custom calculations. DAX is similar to Excel formulas but designed for relational data models.
Common DAX functions include SUM, AVERAGE, COUNTROWS, and FILTER. More advanced functions include CALCULATE, ALL, and RELATED. App Makers preparing for the PL-100 exam should be familiar with the basics of DAX, as it is often tested in scenario-based questions.
Building Visuals in Power BI
The core of Power BI is data visualization. Power BI offers a wide range of visuals including bar charts, line charts, pie charts, tables, cards, and maps. Each visual type is suited for different data stories.
For example, line charts are useful for trends over time, bar charts for comparisons, and maps for geographic data. Choosing the right visual ensures that insights are clear and effective. As an App Maker, you should know how to build visuals that are both accurate and easy to interpret.
Customizing Visuals
Visuals can be customized for clarity and style. Power BI allows you to change colors, labels, titles, and tooltips. Conditional formatting can highlight important data points, such as sales below target or expenses over budget.
Customization ensures that dashboards align with organizational branding and improve user engagement. In the exam, you may encounter tasks that test your ability to format visuals for better understanding.
Filters and Slicers
Filters and slicers are tools for refining data in reports. Filters allow you to restrict the data shown in a visual or an entire report. Slicers are interactive controls that let users select values dynamically.
For example, a slicer can allow users to filter sales data by region or date. This interactivity makes Power BI reports more powerful and user-friendly. Mastering filters and slicers is essential for building effective dashboards.
Dashboards vs Reports
Reports and dashboards serve different purposes in Power BI. Reports are multi-page documents created in Power BI Desktop or Service, containing multiple visuals. Dashboards are single-page summaries in Power BI Service that can display visuals from multiple reports.
Dashboards are ideal for high-level monitoring, while reports are better for detailed analysis. Understanding the difference is important for the exam and for building solutions that meet business needs.
Sharing and Collaboration
Power BI reports can be shared through the Power BI Service. You can publish reports to workspaces, share dashboards with colleagues, or embed visuals in Microsoft Teams and SharePoint. Collaboration ensures that insights reach the right people at the right time.
App Makers should understand licensing implications for sharing. Some features require Power BI Pro or Premium licenses. These details may appear in exam questions, so it is important to review them.
Power BI and Dataverse Integration
Power BI integrates directly with Dataverse. You can connect to Dataverse tables and build reports on top of them. This is particularly useful when building solutions with Model-Driven Apps, as it provides analytics on business data.
By combining Dataverse with Power BI, organizations can gain deeper insights into operations. For the exam, you should understand how to connect Power BI to Dataverse and use it effectively.
Embedding Power BI in Power Apps
Power BI reports can be embedded directly into Power Apps. This allows users to view analytics without leaving the application. For example, a sales app can include an embedded dashboard showing performance by region.
Embedding enhances the user experience by combining functionality and insights. This integration is an important exam objective because it demonstrates how Power Platform components work together.
Power BI and Power Automate Integration
Power BI can trigger actions in Power Automate. For example, when a data threshold is met, a flow can send an alert or update a record. This integration ensures that insights lead to action.
An example is a dashboard that monitors inventory levels. When stock falls below a limit, a flow can automatically send an order request. This combination of Power BI and Power Automate creates intelligent solutions.
Security in Power BI
Security ensures that sensitive data is protected. Power BI uses role-based security to control access. Row-level security allows different users to see different subsets of data.
For example, regional managers may only see data for their region, while executives see data for all regions. Understanding row-level security is a key exam requirement, as it ensures that solutions are compliant with organizational policies.
Monitoring and Optimizing Reports
Performance optimization is important for large datasets. Techniques include reducing unnecessary columns, optimizing DAX calculations, and using aggregations. Monitoring refresh times and query performance ensures that reports run efficiently.
For the exam, you should understand the basics of optimizing Power BI reports. Efficient reports improve user adoption and satisfaction.
Governance and Best Practices
Governance in Power BI includes managing datasets, controlling access, and ensuring data accuracy. Best practices include naming conventions, clear documentation, and maintaining version control.
Organizations often establish governance policies to ensure that reports remain consistent and reliable. As an App Maker, following governance practices shows professionalism and improves trust in your solutions.
Preparing for Power BI in the Exam
The PL-100 exam tests your ability to build visuals, create models, apply filters, and integrate Power BI with other Power Platform tools. You may be given scenarios requiring you to choose the right visual or optimize a dataset.
Hands-on practice is the best preparation. Build reports from multiple data sources, apply DAX calculations, and design dashboards. The more experience you gain, the more confident you will feel in the exam.
Real-World Use Cases of Power BI
Power BI is used across industries for decision-making. In retail, it tracks sales performance by region and product. In healthcare, it monitors patient outcomes and resource usage. In education, it analyzes student performance and engagement.
These use cases highlight the value of data visualization. As an App Maker, building Power BI reports can directly influence strategic decisions and improve outcomes.
The Future of Power BI
Power BI continues to evolve with new features and AI capabilities. Microsoft invests heavily in natural language queries, predictive analytics, and integration with Azure services.
For App Makers, this means opportunities will expand as Power BI becomes more intelligent and accessible. Mastering Power BI today prepares you for the future of data-driven business.
Prepaway's PL-100: Microsoft Power Platform App Maker video training course for passing certification exams is the only solution which you need.
| Free PL-100 Exam Questions & Microsoft PL-100 Dumps | ||
|---|---|---|
| Microsoft.pass4sure.pl-100.v2024-05-08.by.declan.123q.ete |
Views: 111
Downloads: 828
|
Size: 1.21 MB
|
| Microsoft.pass4sures.pl-100.v2021-09-03.by.lincoln.77q.ete |
Views: 177
Downloads: 1812
|
Size: 736.19 KB
|
| Microsoft.actualtests.pl-100.v2021-06-11.by.kayden.60q.ete |
Views: 426
Downloads: 1905
|
Size: 590.2 KB
|
| Microsoft.train4sure.pl-100.v2021-05-15.by.sofia.51q.ete |
Views: 290
Downloads: 1920
|
Size: 558.79 KB
|
| Microsoft.selftestengine.pl-100.v2021-03-26.by.evie.28q.ete |
Views: 257
Downloads: 1972
|
Size: 411.15 KB
|
| Microsoft.braindumps.pl-100.v2020-10-28.by.sienna.21q.ete |
Views: 459
Downloads: 2111
|
Size: 954.52 KB
|
Student Feedback
Can View Online Video Courses
Please fill out your email address below in order to view Online Courses.
Registration is Free and Easy, You Simply need to provide an email address.
- Trusted By 1.2M IT Certification Candidates Every Month
- Hundreds Hours of Videos
- Instant download After Registration
A confirmation link will be sent to this email address to verify your login.
Please Log In to view Online Course
Registration is free and easy - just provide your E-mail address.
Click Here to Register


