- Home
- ServiceNow Certifications
- CAD ServiceNow Certified Application Developer Dumps
Pass ServiceNow CAD Exam in First Attempt Guaranteed!
Get 100% Latest Exam Questions, Accurate & Verified Answers to Pass the Actual Exam!
30 Days Free Updates, Instant Download!

CAD Premium Bundle
- Premium File 218 Questions & Answers. Last update: Jun 26, 2026
- Training Course 54 Video Lectures


Last Week Results!

Includes question types found on the actual exam such as drag and drop, simulation, type-in and fill-in-the-blank.

Based on real-life scenarios similar to those encountered in the exam, allowing you to learn by working with real equipment.
All ServiceNow CAD certification exam dumps, study guide, training courses are Prepared by industry experts. PrepAway's ETE files povide the CAD ServiceNow Certified Application Developer practice test questions and answers & exam dumps, study guide and training courses help you study and pass hassle-free!
First-Time Success Strategies for the ServiceNow CAD Exam
A ServiceNow Application Developer plays a pivotal role in modern IT environments by bridging business needs with technical solutions. Their responsibilities extend beyond simple coding; they must design, configure, and maintain applications on the ServiceNow platform to improve organizational efficiency. Developers are tasked with creating workflows that automate routine tasks, configuring application tables, and implementing forms that ensure smooth data capture and process execution. They also define access controls to maintain security standards while providing the flexibility required by users.
In addition, ServiceNow developers must troubleshoot issues, optimize application performance, and ensure system stability. This role requires a combination of technical proficiency, problem-solving skills, and understanding of business processes. By managing platform architecture and overseeing application lifecycles, developers ensure that the ServiceNow environment effectively supports IT service management and enterprise operations.
Importance of CAD Certification
The ServiceNow Certified Application Developer certification validates that an individual possesses the skills necessary to develop, implement, and manage applications within the ServiceNow ecosystem. This credential demonstrates competency in building solutions that address real-world business challenges, including automation of IT workflows, efficient data management, and integration with existing systems.
Organizations increasingly recognize the value of certified developers as they contribute to operational efficiency and digital transformation initiatives. The certification equips professionals with the ability to design applications that not only meet immediate business requirements but also scale with organizational growth. By achieving CAD certification, developers signal their capability to deliver consistent, high-quality solutions on the ServiceNow platform.
Core Competencies Tested in the CAD Exam
The CAD certification exam assesses practical knowledge and application of ServiceNow concepts. Key areas include application design, workflow creation, and data modeling. Candidates must demonstrate the ability to create and manage tables, implement forms, and ensure proper access control configurations. Knowledge of scripting within the platform, including client-side and server-side logic, is essential for developing robust applications.
Another critical area is the understanding of ServiceNow workflows and their integration with business processes. Developers are expected to configure automated tasks, design notifications, and ensure seamless collaboration between different platform modules. Exam preparation involves mastering these competencies to solve real-world problems efficiently and demonstrate a deep understanding of platform capabilities.
Exam Preparation Strategies
Effective preparation for the CAD exam requires structured learning and consistent practice. Candidates should begin by reviewing the ServiceNow platform’s architecture, focusing on how applications are built, deployed, and maintained. Creating a detailed study plan that breaks down each topic allows for systematic coverage of essential concepts.
Hands-on practice is vital for mastering application development. Working within a sandbox environment to create tables, workflows, and forms provides practical experience that reinforces theoretical knowledge. Practicing common tasks under timed conditions simulates the exam environment, reducing anxiety and improving performance.
Collaborative learning can enhance preparation. Study groups or peer discussions allow for knowledge sharing, clarification of complex topics, and exposure to different problem-solving approaches. Reviewing case studies and real-world scenarios helps candidates understand how concepts are applied in practical situations, preparing them to address exam questions effectively.
Leveraging Real-World Experience
ServiceNow developers gain significant advantage by applying learned concepts in live projects. Experience with enterprise workflows, IT service management, and application configuration offers insight into challenges that may appear on the CAD exam. Understanding the impact of access controls, data models, and workflow automation on business operations allows candidates to approach exam questions with a practical mindset.
Developers should also focus on problem-solving and troubleshooting skills. Identifying bottlenecks, optimizing workflows, and implementing efficient solutions are critical tasks in professional environments and are relevant to the exam. This real-world exposure ensures that candidates not only memorize platform features but also understand how to apply them to meet organizational goals effectively.
Building a Strong Foundation in ServiceNow
A solid foundation in ServiceNow fundamentals is crucial for exam success. Candidates should be proficient in configuring core modules, managing tables, creating forms, and designing workflows. Familiarity with scripting, both client-side and server-side, enhances the ability to develop dynamic applications that respond to user interactions.
Understanding platform integration capabilities is also important. Knowledge of APIs, web services, and connectors allows developers to build applications that communicate effectively with other systems. This ensures that solutions are not isolated but contribute to broader organizational objectives. By mastering these foundational elements, candidates can approach the CAD exam with confidence and clarity.
Exam-Taking Tips
Strategic exam preparation includes familiarizing oneself with the test format, timing, and question types. Candidates should practice answering scenario-based questions that require applying concepts to realistic situations. Reviewing key functionalities such as table relationships, workflows, access controls, and scripting practices ensures readiness for complex problem-solving tasks.
Time management during the exam is critical. Allocating time for each section and prioritizing questions based on familiarity allows candidates to maintain focus and reduce errors. Additionally, reviewing answers before submission ensures accuracy and completeness. Developing a disciplined approach to exam-taking increases the likelihood of success and reduces stress during the test.
Continuing Development Post-Certification
CAD certification is not the endpoint but a milestone in ongoing professional development. Certified developers should continue exploring advanced features, platform upgrades, and best practices. Engaging in community forums, attending workshops, and experimenting with new ServiceNow modules fosters continuous improvement.
Applying newly acquired knowledge to real projects reinforces skills and keeps developers current with industry trends. Maintaining a proactive learning mindset ensures that certified professionals remain valuable contributors to their organizations and can adapt to evolving business needs. This continuous development also enhances career growth opportunities, positioning certified developers for leadership roles in ServiceNow application development.
Impact of Certification on Career Prospects
Achieving CAD certification significantly enhances career opportunities in the IT landscape. Certified developers are recognized for their ability to deliver efficient, scalable, and secure applications within the ServiceNow ecosystem. Employers value professionals who can bridge technical and business requirements, streamline workflows, and support digital transformation initiatives.
The certification also increases visibility in competitive job markets. Professionals can pursue roles such as ServiceNow Developer, Application Analyst, or Workflow Specialist across diverse industries including finance, healthcare, technology, and government sectors. Demonstrating expertise through certification validates skill sets and reinforces credibility, which can translate into higher-level responsibilities and improved compensation.
Integrating Certification Knowledge into Daily Work
ServiceNow CAD certification equips professionals with practical skills that can be immediately applied in their work environment. Developers can design efficient workflows, implement robust data structures, and optimize application performance. Understanding access controls and security configurations ensures compliance with organizational policies and protects sensitive information.
Certified developers also contribute to continuous process improvement by identifying opportunities to automate repetitive tasks and streamline operations. This integration of certification knowledge into daily activities enhances team productivity, reduces operational risks, and supports organizational objectives. The ability to apply theoretical concepts to practical scenarios strengthens both personal expertise and overall business outcomes.
ServiceNow CAD Certification
The ServiceNow CAD exam is a benchmark for professional competence in application development on the ServiceNow platform. Preparing for and achieving this certification requires a structured approach that combines theoretical study, hands-on practice, and real-world experience. By mastering platform fundamentals, understanding workflows, and honing problem-solving skills, candidates can achieve success in the exam and excel in their professional roles.
Beyond exam achievement, CAD certification enhances career growth, professional credibility, and technical expertise. It equips developers to contribute meaningfully to organizational efficiency and digital transformation initiatives. Continuous learning and practical application of ServiceNow knowledge ensure long-term relevance and success in a rapidly evolving IT landscape.
Advanced Application Development Techniques on ServiceNow
In the context of CAD certification, advanced application development techniques are crucial for creating robust and scalable applications. Developers need to understand not just the basic platform functionalities but also how to leverage advanced features to optimize performance. Techniques such as server-side scripting using Business Rules, Script Includes, and Client Scripts allow automation of complex workflows and enhance user experience. Mastery of these scripts is essential for the CAD exam as they form the backbone of dynamic application behavior on the platform.
Additionally, understanding asynchronous processing through events and scheduled jobs enables developers to manage background tasks efficiently. ServiceNow applications often need to handle large datasets or execute recurring processes without affecting system performance. Implementing these techniques ensures reliability and responsiveness in enterprise environments, which is a core competency tested in the CAD certification exam.
Data Modeling and Table Design
A significant portion of the CAD exam focuses on data modeling and effective table design. Developers must demonstrate the ability to create application tables that align with organizational needs, maintain data integrity, and support scalable application architecture. Normalization of data, defining relationships between tables, and establishing reference fields are fundamental skills.
Creating appropriate access controls at the table and field level ensures security while allowing necessary visibility for different roles. Understanding dictionary attributes and table extensions enables developers to reuse data structures efficiently and avoid redundancy. The exam evaluates a candidate’s ability to construct logical, maintainable, and secure data models that support real-world application requirements.
Workflow and Process Automation
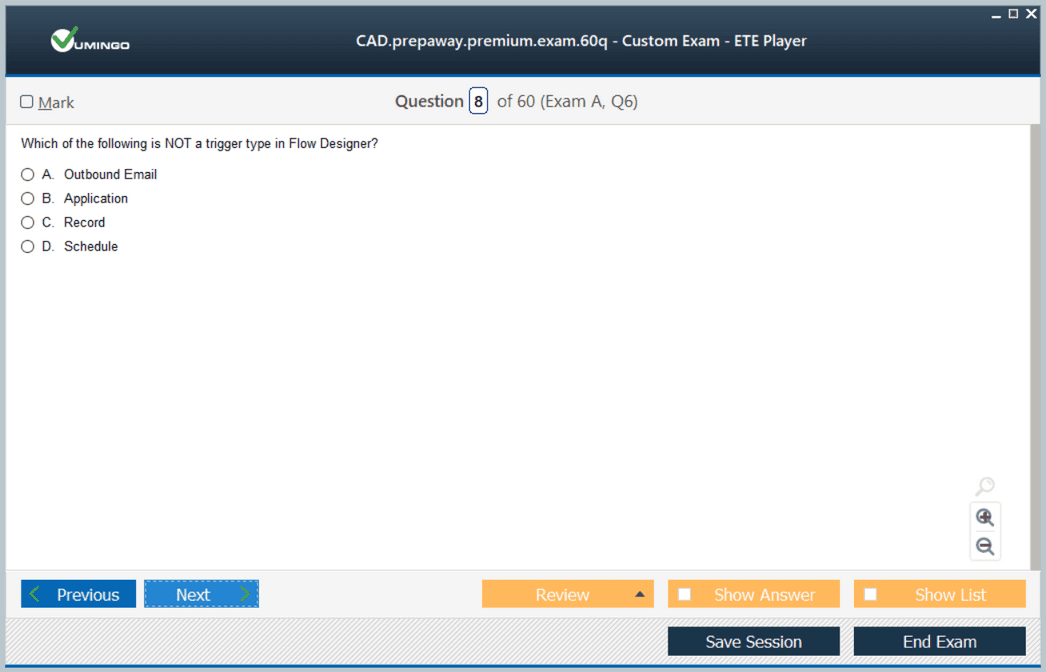
CAD certification places strong emphasis on process automation. Developers must be able to design workflows that streamline business operations while reducing manual intervention. Knowledge of Flow Designer, Workflow Editor, and scripting for workflow activities is tested. Developers should understand how to configure approvals, task assignments, and notifications that align with business logic.
Effective workflow design not only automates routine tasks but also ensures compliance with organizational policies. Developers are expected to handle exceptions, rollback scenarios, and error notifications to maintain operational continuity. Understanding workflow best practices, including modular design and reusable components, prepares candidates for exam scenarios requiring practical implementation of process automation.
Integrating Applications with ServiceNow Modules
ServiceNow is a platform with multiple modules, and application developers must know how to integrate their applications seamlessly with other modules like Incident, Problem, Change Management, and CMDB. This involves using ServiceNow APIs, scriptable web services, and integration tools to facilitate data exchange and process synchronization.
For the CAD exam, candidates should demonstrate the ability to implement integrations that maintain data consistency, respect access controls, and operate efficiently under varying loads. Understanding the impact of integration on application performance and user experience is critical. Mastery of integration techniques reflects a developer’s capability to extend the platform’s utility beyond isolated applications, enhancing organizational productivity.
Security and Access Control
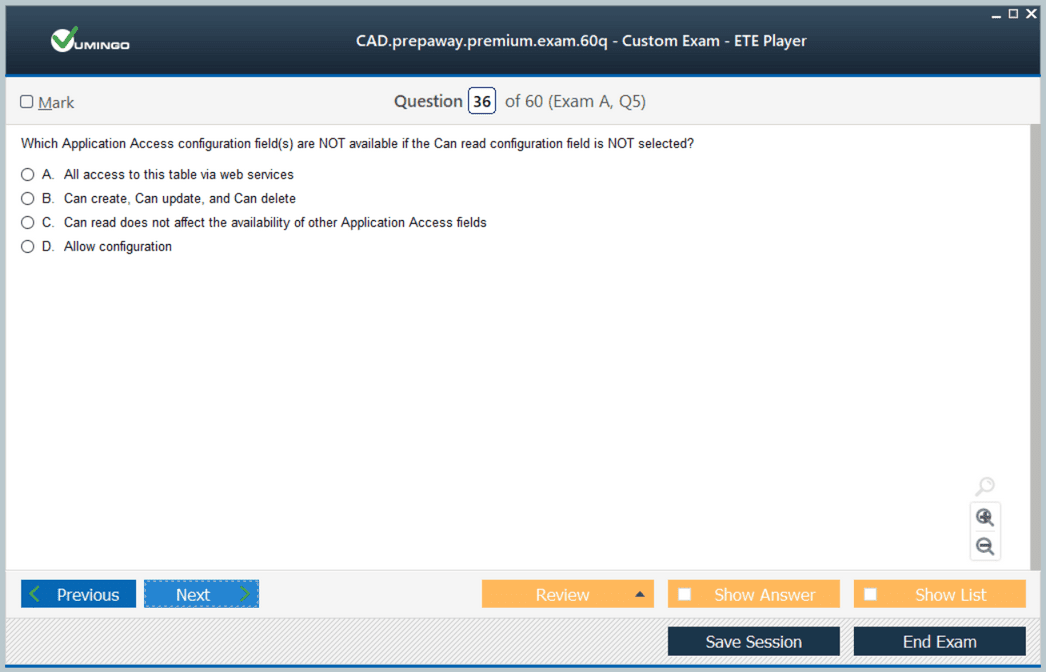
Security is a critical aspect of the CAD exam and an essential competency for professional ServiceNow developers. Candidates are required to understand access control rules, roles, and permission schemes. Implementing these correctly ensures that sensitive information is protected while allowing appropriate access for different user groups.
Developers must also be adept at configuring conditional access, field-level security, and script-based access checks. Understanding the principle of least privilege and applying it effectively within applications is crucial. Exam scenarios often present complex security requirements, and candidates are tested on their ability to configure robust security measures that align with business policies and compliance standards.
User Interface Design and Experience
User interface design is another area emphasized in the CAD exam. Developers must create intuitive forms, lists, and dashboards that facilitate efficient user interactions. Knowledge of ServiceNow UI policies, client scripts, and form layout configuration ensures that applications are user-friendly and adhere to organizational standards.
Customizing interfaces for different roles, implementing real-time data validation, and providing contextual guidance are important skills. The exam tests the ability to design forms that not only capture accurate data but also enhance user experience. Mastery of interface design principles contributes to better adoption of applications and aligns with the practical expectations of the CAD certification.
Reporting, Dashboards, and Performance Analytics
ServiceNow applications often require built-in reporting and analytics features. CAD-certified developers are expected to create performance dashboards, generate reports, and implement indicators that provide actionable insights. Understanding report types, data visualization techniques, and scheduled reporting capabilities is essential.
Candidates must also consider performance implications when designing reports and dashboards. Efficient queries, proper use of database indexes, and avoiding redundant calculations ensure optimal performance. The exam may assess knowledge of creating reports that balance detail with clarity, highlighting the developer’s ability to support decision-making processes through accurate data presentation.
Testing, Debugging, and Troubleshooting
Effective testing and debugging are fundamental skills for the CAD exam. Developers must validate application logic, identify defects, and implement corrective actions efficiently. Familiarity with automated testing tools, manual testing strategies, and debugging scripts is important for ensuring application reliability.
Understanding how to trace workflow execution, evaluate logs, and simulate various user scenarios is critical. Exam scenarios often test the ability to diagnose and resolve issues without compromising application integrity. Mastery of testing and troubleshooting enhances confidence and ensures developers can maintain high-quality applications under real-world conditions.
Exam Preparation Techniques
Success in the CAD exam requires structured preparation. Developing a study plan that covers all major competencies, including data modeling, scripting, workflow design, security, and UI configuration, is essential. Consistent hands-on practice in a personal or sandbox instance ensures familiarity with platform functionalities.
Simulating exam scenarios by creating sample applications, implementing workflows, and managing security rules enhances problem-solving skills. Practicing under timed conditions helps develop pacing strategies and reduces anxiety. Review of platform documentation, understanding best practices, and studying scenario-based examples further strengthens readiness for the CAD exam.
Integrating Certification Knowledge into Career Growth
Earning the CAD certification not only validates technical expertise but also provides a pathway for career advancement. Certified developers are positioned to take on complex projects, lead development initiatives, and contribute to organizational digital transformation. Applying knowledge gained through certification enables professionals to improve system efficiency, implement innovative solutions, and support strategic business objectives.
Continuous learning beyond certification, such as exploring new modules, integration options, and platform upgrades, ensures that CAD-certified developers remain relevant in an evolving IT landscape. Combining certification knowledge with real-world experience enhances credibility, opens up advanced career opportunities, and positions professionals as key contributors in ServiceNow-driven enterprises.
Advanced Integration Practices in ServiceNow
Integration capabilities form a critical part of the CAD certification exam. ServiceNow developers must understand how to connect applications with external systems, ensuring data consistency and workflow continuity. Common integration methods include REST and SOAP web services, scripted REST APIs, and inbound/outbound integrations that allow seamless communication between applications. Proper integration design is essential for supporting complex enterprise requirements and for building scalable, maintainable solutions within ServiceNow.
Developers should also be able to configure authentication protocols such as OAuth 2.0, basic authentication, and token-based mechanisms to secure integrations. Knowledge of transforming data between ServiceNow and external systems using data sources, transform maps, and import sets is critical. Exam scenarios may present cases where candidates must design integration workflows that support both synchronous and asynchronous processes without compromising performance or security.
Scenario-Based Application Design
The CAD exam evaluates the ability to apply practical knowledge in real-world scenarios. Candidates are often presented with case studies that require analyzing business requirements and designing applications that meet specific objectives. This includes identifying entities, defining relationships, configuring workflows, implementing access controls, and creating reports to monitor application performance.
Understanding how to translate business needs into technical specifications is a key skill. Developers should practice designing applications from scratch in sandbox environments, addressing scenario constraints, and iterating solutions to align with stakeholder expectations. Mastery of scenario-based design demonstrates proficiency in applying theoretical concepts to practical development challenges.
Optimization Strategies for Performance
Performance optimization is an important aspect of the CAD certification. Developers need to ensure applications are efficient, responsive, and capable of handling large volumes of data. Techniques include optimizing queries, using database indexes effectively, minimizing server-side scripts where possible, and leveraging client-side scripts for performance-critical operations.
Knowledge of asynchronous processing, batch processing, and caching mechanisms helps in improving application performance. Candidates must also be able to monitor and troubleshoot slow-running processes, implement best practices for script execution, and balance system load. The exam tests the ability to design applications that maintain high performance while meeting functional requirements.
Best Practices for Security Implementation
Security remains a cornerstone of ServiceNow application development. CAD certification evaluates understanding of role-based access control, field-level security, table-level permissions, and secure application design principles. Developers must be able to implement access controls that restrict data visibility according to user roles while ensuring operational functionality.
Awareness of security risks, compliance requirements, and best practices for encryption, secure coding, and audit logging is critical. Exam questions may require designing secure applications under various threat scenarios, demonstrating the candidate’s ability to protect sensitive data and maintain system integrity. Practicing real-world security configurations strengthens understanding and readiness for the certification exam.
Advanced Workflow and Automation Techniques
Automation is central to enterprise efficiency, and CAD-certified developers must know how to design complex workflows. Beyond basic Flow Designer usage, candidates should understand conditional logic, approvals, parallel tasks, and exception handling. Implementing reusable workflow components enhances maintainability and supports enterprise standards.
Developers should also be familiar with integrating workflows across multiple applications and modules, handling multi-step approvals, and implementing notifications and escalations. Exam scenarios may simulate business processes that require careful workflow planning and testing, assessing a candidate’s ability to automate operations while preserving data integrity and reliability.
Reporting, Metrics, and Analytics
Reporting and analytics are critical for assessing application impact and supporting decision-making. CAD certification emphasizes creating reports, dashboards, and performance indicators that provide actionable insights. Developers must understand how to design meaningful visualizations, configure scheduled reports, and present data that informs management decisions.
Candidates should also be able to implement key performance indicators, measure workflow efficiency, track user interactions, and analyze system performance. Understanding reporting best practices ensures that data is not only accurate but also useful for evaluating process improvements and business outcomes.
Testing Strategies and Debugging
Effective testing and debugging are essential skills for ServiceNow developers and are assessed in the CAD exam. Candidates should understand unit testing, integration testing, and end-to-end validation within the ServiceNow platform. Techniques include using automated testing frameworks, manual testing of workflows, and simulating real-world user interactions.
Debugging scripts, monitoring logs, and resolving errors efficiently is critical for maintaining application stability. Practicing test cases under realistic conditions helps candidates identify potential issues before deployment. The exam may present complex scenarios requiring candidates to diagnose problems, implement solutions, and validate functionality under controlled conditions.
Hands-On Practice and Lab Work
Practical experience is fundamental to CAD certification preparation. Working in a sandbox environment allows developers to experiment with application creation, workflow automation, security configurations, and integration design. Hands-on labs reinforce theoretical knowledge, build confidence, and provide exposure to scenarios likely to appear in the exam.
Candidates should create diverse applications, test integrations, and configure reporting dashboards while documenting processes. This approach helps solidify understanding, develops problem-solving abilities, and ensures familiarity with the platform’s practical application. Consistent practice is one of the most effective strategies for success in the CAD exam.
Exam Preparation and Study Techniques
Structured preparation is essential to perform well in the CAD exam. Candidates should develop a study plan that allocates time for hands-on practice, review of platform documentation, and scenario-based exercises. Creating outlines of major topics, focusing on weak areas, and simulating exam conditions help improve retention and performance.
Study groups or peer discussions can enhance learning by providing alternative perspectives on problem-solving and platform usage. Balancing study with rest, managing time effectively, and maintaining consistent practice reduces exam anxiety and enhances confidence.
Applying CAD Knowledge to Career Development
CAD certification equips professionals with the skills needed to design, implement, and maintain applications that solve real business problems. This expertise opens opportunities for advanced roles in IT service management, workflow automation, and enterprise application development. Certified developers can contribute to digital transformation initiatives, improve operational efficiency, and support organizational goals through innovative application solutions.
Continuous learning and staying updated with platform upgrades, new modules, and emerging best practices ensures that CAD-certified professionals maintain a competitive edge. Combining certification knowledge with practical experience allows developers to lead projects, mentor peers, and become valuable contributors in enterprise environments.
Advanced Scenario-Based Exercises
A significant portion of the CAD exam focuses on scenario-based exercises that simulate real-world development challenges. Candidates are required to demonstrate their ability to analyze business requirements, design applications, implement workflows, and configure security controls under realistic constraints. These exercises test the developer's ability to think critically, prioritize tasks, and implement solutions efficiently.
For instance, candidates may be presented with a case where multiple departments require access to a new application, each with different permissions. Developers must design tables, create roles, configure ACLs, and define workflow approvals. Understanding these practical applications helps developers translate theoretical knowledge into functional, enterprise-ready solutions.
Scenario exercises often integrate multiple platform features, requiring the use of client scripts, business rules, and Flow Designer actions. Practicing with such exercises enhances the ability to troubleshoot issues, optimize performance, and anticipate potential challenges before they arise.
Performance Optimization and Scalability
Optimizing application performance is crucial for CAD certification. Developers should focus on efficient database design, indexing strategies, and minimizing unnecessary server calls. Using asynchronous processing for resource-intensive tasks helps reduce system latency and ensures smooth operation even under high user loads.
Scalability considerations involve designing applications that can handle growing amounts of data and increasing user interactions. Developers must anticipate system growth and implement modular, reusable components to support future expansion. Techniques such as script includes, UI actions, and client-side scripting should be applied judiciously to maintain a balance between functionality and performance.
Candidates should also be adept at monitoring system performance using platform-provided tools. Metrics such as query response time, transaction times, and error logs provide insights into potential bottlenecks. Regular performance reviews and adjustments ensure the application remains robust and responsive.
Integration Challenges and Best Practices
ServiceNow applications often need to interact with external systems, making integration expertise vital for the CAD exam. Candidates must understand REST and SOAP web services, scripted APIs, and import/export mechanisms. Proper authentication protocols such as OAuth, basic authentication, and token-based approaches are essential for secure integration.
Handling data transformations between different formats and systems is another critical skill. Transform maps, import sets, and custom scripts are used to ensure data consistency and integrity across platforms. Exam scenarios may involve designing workflows that incorporate data from multiple sources while maintaining security and performance standards.
Best practices include minimizing synchronous calls to avoid delays, validating incoming data, and implementing error handling to manage exceptions gracefully. Demonstrating knowledge of these techniques shows readiness for enterprise-level application development.
Security Design and Compliance
Security remains a core component of the CAD certification exam. Developers must design applications that enforce role-based access controls, table-level permissions, and field-level restrictions. Security best practices involve encrypting sensitive data, auditing access logs, and implementing secure coding techniques.
Candidates may face exam scenarios requiring the application of compliance standards, ensuring that workflows adhere to organizational policies and regulatory requirements. Awareness of potential security risks, such as unauthorized data access or injection attacks, is crucial. Practical experience in configuring ACLs, testing permissions, and validating security policies strengthens preparedness for the exam.
Understanding the balance between usability and security is essential. Overly restrictive security may hinder business processes, while lax controls can expose critical data. CAD-certified developers must demonstrate the ability to implement secure, functional applications that meet enterprise standards.
Advanced Workflow Automation
Workflow automation is a significant area in the CAD exam. Developers are expected to design complex workflows that incorporate approvals, conditional logic, and exception handling. Using Flow Designer and workflow editor, candidates can create reusable components that enhance efficiency and maintainability.
Exam scenarios may require coordinating multiple tasks across different departments, triggering notifications, and handling escalations. Automation extends beyond simple task routing, requiring careful planning to optimize performance and minimize errors. Candidates must demonstrate the ability to implement workflows that adapt to dynamic business requirements and support iterative improvements.
Understanding parallel processing, event-driven triggers, and integration with other applications is critical. Advanced workflow knowledge allows developers to streamline processes, reduce manual intervention, and improve overall operational efficiency.
Reporting, Dashboards, and Analytics
The CAD exam also evaluates a candidate’s ability to design effective reporting solutions. Developers should be proficient in creating reports, dashboards, and performance indicators that provide actionable insights to stakeholders. Knowledge of scheduled reports, performance analytics, and KPIs is essential.
Candidates may need to present data visually, configure metrics, and create dashboards that track application performance. Exam scenarios often require using reporting tools to monitor workflow efficiency, identify bottlenecks, and support strategic decision-making. Accurate and meaningful reports demonstrate the developer’s ability to translate application data into valuable business insights.
Testing, Validation, and Troubleshooting
Testing is a critical skill for CAD-certified developers. Candidates should understand unit testing, integration testing, and end-to-end validation to ensure application reliability. Using automated testing tools, simulating user scenarios, and reviewing system logs help identify issues before deployment.
Exam exercises may involve debugging scripts, troubleshooting workflows, or validating access controls. Candidates must show competence in resolving errors efficiently, optimizing performance, and ensuring that applications function correctly in real-world conditions. Familiarity with best practices for test case creation, scenario simulation, and issue resolution strengthens preparedness for the certification exam.
Practical Labs and Hands-On Experience
Hands-on practice is essential to succeed in the CAD certification exam. Developers should engage in lab exercises that simulate realistic development environments, allowing them to apply knowledge of table design, scripting, workflow automation, integration, security, and reporting.
Lab experience reinforces learning, improves problem-solving skills, and builds confidence. Working through complex scenarios, configuring applications, and testing workflows ensures that candidates are comfortable with the platform’s functionality. Consistent practice also helps in anticipating exam questions and managing time effectively during the test.
Exam Preparation Strategies
A structured approach is crucial for CAD exam success. Candidates should allocate time for theory review, hands-on practice, scenario exercises, and self-assessment. Creating outlines of key topics, practicing under timed conditions, and reviewing previous exercises help reinforce understanding and improve performance.
Collaborative study groups allow candidates to discuss challenges, clarify doubts, and share alternative solutions. Balanced study sessions, sufficient rest, and consistent practice contribute to better retention and reduce exam stress. Familiarity with the exam format, question types, and scoring methodology further increases the likelihood of passing on the first attempt.
Leveraging CAD Certification for Career Growth
CAD certification validates expertise in designing, developing, and maintaining ServiceNow applications. Certified developers can take on advanced roles in IT service management, application development, and workflow automation. This credential enhances employability, demonstrates proficiency to employers, and supports career advancement in enterprise environments.
Continuous learning and staying updated with platform updates, new features, and industry best practices ensure that CAD-certified professionals remain competitive. Applying certification knowledge to real-world projects improves problem-solving capabilities, supports digital transformation initiatives, and contributes to organizational efficiency and innovation.
Final Preparation Strategies for CAD Exam
Successfully passing the CAD certification exam requires a comprehensive approach that combines theory, practical application, and strategic preparation. In the final stages before the exam, candidates should focus on reinforcing their knowledge of ServiceNow platform fundamentals, advanced application design, workflow automation, integration techniques, and performance optimization. Reviewing each module systematically ensures a thorough understanding of how individual components interconnect to create functional, efficient applications.
A structured review should begin with the foundational aspects of the platform. This includes understanding table structures, field types, relationships, and data schema design. Familiarity with application scopes, update sets, and modular architecture is essential, as exam scenarios often require candidates to create solutions that are scalable, maintainable, and aligned with best practices. Spending time revisiting these concepts ensures that candidates can quickly identify and implement appropriate design patterns during the exam.
Scenario-Based Problem Solving
Scenario-based problem solving is critical for CAD exam success. Candidates are expected to apply their knowledge to complex, realistic scenarios involving multiple components of the ServiceNow platform. Examples include designing multi-department workflows, configuring role-based access for sensitive applications, integrating external systems through APIs, or troubleshooting a combination of client and server-side scripts.
Practicing these scenarios under timed conditions builds confidence and helps improve decision-making speed. Candidates should simulate exam conditions, document their solutions, and review alternative approaches to understand potential variations in problem-solving strategies. This iterative practice also helps identify gaps in understanding, allowing candidates to focus on weaker areas before the exam.
Mastering Workflow Automation
Advanced workflow automation knowledge is a major differentiator for CAD certification candidates. Understanding how to use Flow Designer, workflow editor, and script includes in concert allows developers to create complex, automated business processes. Candidates should be proficient in implementing conditional logic, parallel task execution, approvals, notifications, and exception handling.
Exam scenarios may require the combination of multiple workflows, integration with external applications, and optimization for performance. Practicing these skills ensures that candidates can deliver functional and efficient solutions that meet enterprise-level requirements. Reviewing case studies and analyzing how workflows are used in real-world business contexts provides insight into practical implementation challenges and best practices.
Security and Compliance Considerations
Security and compliance form an integral part of CAD exam preparation. Candidates must demonstrate the ability to configure access controls, implement table and field-level permissions, and secure sensitive data through encryption and auditing. Understanding regulatory and organizational compliance requirements is equally important, as exam scenarios may involve implementing security measures that adhere to these standards.
Reviewing common vulnerabilities, potential attack vectors, and secure coding practices ensures that candidates are prepared to design applications that are both functional and secure. Hands-on practice in configuring ACLs, role-based permissions, and data protection features helps reinforce theoretical knowledge and builds confidence in handling security-focused tasks during the exam.
Performance Optimization Techniques
Optimizing application performance is essential in demonstrating proficiency in CAD certification. Candidates should understand best practices for database design, indexing, server-side processing, and minimizing unnecessary client-server interactions. Scenarios may involve designing applications that maintain efficiency under high user loads or large data volumes.
Familiarity with asynchronous processing, scheduled jobs, and performance monitoring tools allows candidates to anticipate potential bottlenecks and implement solutions that ensure reliability and responsiveness. Practicing these techniques in lab environments reinforces learning and enables developers to make informed decisions during the exam.
Integration Skills
Integration with external systems is often tested in the CAD exam. Candidates should be comfortable using REST and SOAP web services, scripted APIs, and import sets to manage data exchanges. Proper authentication methods, data transformation techniques, and error handling practices are crucial for maintaining security and data integrity.
Simulating integration scenarios helps candidates develop the skills needed to handle real-world challenges, such as combining data from multiple sources, automating cross-platform workflows, and validating incoming information. Understanding best practices for efficient and secure integration ensures that candidates can design solutions that align with enterprise needs.
Reporting, Dashboards, and Analytics
The ability to design effective reporting solutions and dashboards is an essential skill for CAD-certified developers. Candidates should review techniques for creating reports, tracking KPIs, configuring performance metrics, and presenting actionable insights to stakeholders. Scenarios may require the visualization of workflow efficiency, data trends, or user activity patterns.
Hands-on practice in building dashboards and configuring real-time analytics helps reinforce concepts and provides practical experience in delivering insights that support decision-making. Candidates should focus on ensuring that reports are both accurate and easily interpretable, reflecting the key objectives of the organization.
Testing and Validation
Comprehensive testing and validation practices are fundamental for demonstrating proficiency in CAD certification. Candidates should understand unit testing, integration testing, and end-to-end validation processes. Exam scenarios may involve debugging scripts, troubleshooting workflows, and validating access controls to ensure applications perform correctly under varying conditions.
Practicing testing strategies in lab environments helps candidates anticipate potential issues and apply problem-solving techniques effectively. Familiarity with automated testing tools, scenario simulations, and validation checklists allows developers to systematically identify and resolve issues, ensuring high-quality application delivery.
Practical Lab Exercises
Hands-on lab exercises are crucial for reinforcing theoretical knowledge and developing practical skills. Candidates should engage with exercises that simulate real-world application development, covering table creation, workflow design, scripting, integration, security, reporting, and performance optimization.
Consistent lab practice improves problem-solving speed, strengthens understanding of platform capabilities, and builds confidence for exam day. Documenting lab outcomes, reviewing alternative approaches, and reflecting on challenges encountered ensures that candidates are well-prepared to tackle the full range of exam scenarios.
Time Management and Study Discipline
Effective time management is essential for successful exam preparation. Candidates should develop structured study schedules that balance theory review, hands-on practice, scenario exercises, and self-assessment. Consistent study sessions, regular progress reviews, and targeted focus on weaker areas help maximize retention and proficiency.
Time management skills are also critical during the exam itself. Practicing under timed conditions allows candidates to gauge the time required for each section, prioritize tasks effectively, and avoid last-minute stress. Maintaining a disciplined approach ensures that candidates can perform optimally throughout the exam.
Final Review and Confidence Building
In the final days before the exam, candidates should focus on reviewing key concepts, practicing scenario-based exercises, and reinforcing areas of weakness. Revisiting documentation, workflows, scripts, and integration techniques ensures comprehensive readiness.
Building confidence involves acknowledging progress, understanding exam structure, and developing a calm, methodical approach to problem-solving. Visualization techniques, mock exams, and discussion with peers or mentors provide additional support and help reinforce a positive mindset.
Leveraging CAD Certification for Career Advancement
Earning the CAD certification validates the ability to design, develop, and maintain ServiceNow applications effectively. Certified professionals are well-positioned for roles in IT service management, application development, workflow optimization, and enterprise digital transformation initiatives.
Applying certification knowledge to real-world projects enhances problem-solving skills, supports organizational efficiency, and demonstrates expertise to employers. Continuous learning, staying updated with platform advancements, and refining technical and soft skills ensures that CAD-certified developers remain competitive in a rapidly evolving technology landscape.
Deep Dive into Platform Capabilities
Achieving success in the CAD certification requires a comprehensive grasp of the ServiceNow platform’s capabilities. This includes understanding the core modules, development tools, and service automation frameworks available. Candidates should explore the relationships between tables, forms, scripts, and workflows, as well as how these components interact with broader IT service management processes. Developing a deep understanding of the platform enables candidates to design applications that are not only functional but also scalable, secure, and optimized for performance in large-scale environments.
Application Design Principles
Effective application design is central to the CAD certification exam. Candidates must demonstrate the ability to create well-structured applications that incorporate robust tables, appropriate data types, and efficient field configurations. Designing applications requires consideration of user experience, data integrity, and system performance. Utilizing best practices such as modular design, reusable components, and adherence to architectural standards ensures that applications are maintainable and align with organizational objectives.
Advanced Workflow Management
Workflow management is a critical area in CAD exam preparation. Candidates should master the use of the Flow Designer and the legacy workflow editor to automate business processes. Understanding task sequencing, approvals, notifications, and conditional logic allows developers to create workflows that handle complex business scenarios. Practical knowledge of exception handling, workflow debugging, and performance monitoring is essential for building applications that are reliable and responsive to organizational needs.
Scripting and Automation Skills
Proficiency in scripting is a hallmark of a successful CAD candidate. This includes server-side scripting for business rules, client-side scripting for UI actions and policies, and script includes for reusable code. Understanding how to leverage scripting to automate repetitive tasks, enforce validation, and enhance user interaction is critical. Candidates should practice writing clean, efficient code and testing scripts in various scenarios to ensure accuracy and stability.
Integration and Data Management
Integration with external systems is an increasingly important component of the CAD exam. Candidates should be proficient in REST and SOAP web services, data imports, and API-based communication. Skills in data mapping, transformation, and validation are essential for ensuring that data exchanged between ServiceNow and other platforms is accurate and secure. Hands-on practice with integration scenarios provides experience in resolving real-world challenges such as data consistency, authentication, and error handling.
Security and Access Control
A significant aspect of the CAD certification is understanding and implementing security and access controls. Candidates must be able to configure roles, ACLs, and field-level permissions to ensure that only authorized users can access sensitive data and functionality. Knowledge of encryption, auditing, and compliance standards enhances the ability to design applications that meet enterprise security requirements. Practical exercises in configuring and testing access controls prepare candidates for exam scenarios where security implementation is evaluated.
Reporting and Analytics
Developing the ability to create insightful reports and dashboards is critical for ServiceNow application developers. Candidates should be able to design reports that provide actionable insights into workflows, user activity, and performance metrics. Skills in KPI tracking, visual analytics, and dashboard configuration ensure that applications support data-driven decision-making. Practicing the creation of dynamic and interactive dashboards enhances familiarity with platform capabilities and reinforces learning for exam scenarios.
Testing, Validation, and Quality Assurance
Candidates preparing for the CAD certification must focus on rigorous testing and validation of applications. This includes unit testing, integration testing, and end-to-end scenario validation. Understanding common failure points, troubleshooting techniques, and debugging strategies ensures that applications meet quality standards. Simulating various user interactions and workflow paths provides confidence in delivering robust, error-free solutions during the exam.
Exam Strategy and Time Management
Strategic preparation is crucial for passing the CAD certification exam. Candidates should develop a structured study plan that includes review of key concepts, hands-on practice, scenario exercises, and timed mock exams. Managing time effectively during preparation and while taking the exam ensures that candidates can address all questions and practical exercises systematically. Emphasis on understanding exam objectives, question types, and performance-based tasks helps maximize efficiency and accuracy.
Leveraging Certification for Career Growth
Earning the CAD certification opens significant career opportunities in IT service management, platform administration, and enterprise application development. Certified professionals are equipped to design and implement solutions that enhance operational efficiency, automate workflows, and support digital transformation initiatives. Applying certification knowledge to real-world projects not only strengthens technical skills but also demonstrates capability to employers, contributing to career advancement and professional recognition.
Continuous Learning and Skill Enhancement
While certification demonstrates proficiency at a point in time, ongoing learning is critical for maintaining relevance in the rapidly evolving ServiceNow ecosystem. Candidates and certified professionals should engage in continuous skill enhancement, including exploring new platform features, integration techniques, and workflow automation trends. Staying updated with best practices, attending webinars, and participating in community discussions ensures that skills remain current and adaptable to emerging organizational needs.
Building Practical Experience
Practical experience complements theoretical knowledge and is essential for mastering the CAD exam. Candidates should spend considerable time developing and refining applications, creating workflows, and implementing integrations in lab environments. Documenting processes, reflecting on challenges encountered, and iterating solutions helps reinforce learning and builds problem-solving confidence. Exposure to diverse application scenarios prepares candidates for complex exam questions and real-world responsibilities.
Collaboration and Communication Skills
A successful ServiceNow application developer must combine technical proficiency with effective collaboration and communication. Candidates should practice articulating design decisions, explaining workflows, and documenting applications clearly. Engaging in peer reviews, study groups, and collaborative exercises enhances the ability to convey complex concepts concisely and professionally. These skills are particularly valuable in exam scenarios where explanation of design choices may be required.
Maintaining Focus and Avoiding Burnout
Preparing for the CAD exam can be intensive, and candidates must manage study-related stress to maintain peak performance. Structured study sessions, regular breaks, and healthy lifestyle practices contribute to cognitive retention and problem-solving efficiency. Avoiding burnout ensures that candidates approach both preparation and the exam with clarity, focus, and confidence.
Final Integration of Knowledge
Success in the CAD certification exam requires the integration of multiple skill areas into a cohesive understanding of the ServiceNow platform. Candidates must demonstrate the ability to design applications, automate workflows, manage data, ensure security, integrate systems, and deliver actionable insights through reporting. Continuous practice, scenario-based learning, and strategic review consolidate these competencies, preparing candidates to excel under exam conditions and in professional practice.
Maximizing Exam Readiness
In the final phase of preparation, candidates should focus on consolidating knowledge, reinforcing weak areas, and practicing realistic exam scenarios. This includes revisiting workflows, scripts, integrations, and reporting configurations, as well as reviewing best practices for security and performance. Mock exams and timed exercises help simulate the pressure and structure of the actual test, building confidence and readiness for all components of the CAD certification exam.
Applying CAD Certification to Enterprise Solutions
Certified professionals are equipped to contribute meaningfully to enterprise-level ServiceNow implementations. Understanding how to translate business requirements into automated, efficient applications allows CAD-certified developers to drive operational improvements and support strategic objectives. Knowledge gained during exam preparation translates directly into practical capabilities that add value to organizations and enhance digital transformation efforts.
Sustaining Long-Term Competence
Maintaining competence post-certification involves continuous engagement with platform updates, advanced features, and evolving business needs. Certified developers should pursue ongoing hands-on practice, participate in professional forums, and remain aware of best practices in workflow automation, integration, and application optimization. This sustained focus ensures that CAD-certified professionals remain valuable contributors in an ever-changing technological landscape.
Preparing for Complex Problem Solving
The CAD exam emphasizes practical application of knowledge to complex problems. Candidates should focus on multi-layered scenarios that require integration of scripting, workflow design, security implementation, and data management. Developing a systematic approach to problem-solving, documenting steps, and reviewing alternative solutions reinforces preparedness for high-stakes exam situations.
Emphasizing Real-World Relevance
The CAD certification exam reflects real-world challenges faced by ServiceNow application developers. Candidates should prioritize understanding how theoretical concepts are applied in practice, including designing applications that are scalable, secure, maintainable, and aligned with business processes. Hands-on practice, scenario exercises, and review of enterprise implementations bridge the gap between knowledge and practical execution.
Building Confidence Through Repetition
Consistent practice and repetition of key skills foster confidence and efficiency. Candidates should rehearse workflows, scripting solutions, integrations, and reporting configurations multiple times to internalize processes. This repetition ensures quick recall under exam conditions and reduces anxiety, allowing candidates to approach each scenario methodically and accurately.
Leveraging Peer Collaboration
Collaborating with peers provides opportunities for knowledge exchange, alternative perspectives, and joint problem-solving. Study groups and discussion sessions enhance understanding of complex concepts and expose candidates to different approaches. This collaborative preparation supports comprehensive mastery of exam objectives and reinforces practical skills.
Reinforcing Exam Objectives
Candidates should continuously align study activities with the CAD exam objectives. This includes reviewing key topics, understanding performance-based tasks, and ensuring familiarity with all platform features relevant to the exam. Clear alignment between preparation and exam expectations increases efficiency and boosts the likelihood of successful certification.
Enhancing Adaptability
ServiceNow platforms are dynamic, and the CAD exam assesses the ability to adapt knowledge to varied situations. Candidates should practice handling unexpected challenges, such as troubleshooting errors, modifying workflows on-the-fly, or optimizing scripts under performance constraints. This adaptability ensures readiness for both the exam and real-world application development scenarios.
Continuous Feedback and Iteration
Seeking feedback from mentors, peers, or practice exam results allows candidates to identify weaknesses and implement targeted improvements. Iterative learning, refinement of techniques, and adjustment of study strategies contribute to sustained progress and thorough exam preparedness.
Conclusion
Preparing for the ServiceNow CAD certification exam involves a strategic blend of theory, hands-on practice, scenario-based exercises, and continuous self-assessment. Mastery of application design, workflow automation, scripting, integration, security, and reporting is essential. Candidates who dedicate focused time, practice rigorously, leverage collaboration, and maintain balance in study routines are well-positioned to achieve certification and apply these competencies effectively in professional environments. The CAD certification validates the ability to deliver high-quality ServiceNow applications that solve complex business challenges and support enterprise objectives.
ServiceNow CAD practice test questions and answers, training course, study guide are uploaded in ETE Files format by real users. Study and Pass CAD ServiceNow Certified Application Developer certification exam dumps & practice test questions and answers are to help students.
Exam Comments * The most recent comment are on top
- CIS-DF - Certified Implementation Specialist - Data Foundations (CMDB and CSDM)
- CSA - ServiceNow Certified System Administrator
- CAD - ServiceNow Certified Application Developer
- CIS-CSM - Certified Implementation Specialist - Customer Service Management
- CIS-ITSM - Certified Implementation Specialist - IT Service Management
- CIS-SPM - Certified Implementation Specialist - Strategic Portfolio Management
- CIS-HR - Certified Implementation Specialist - Human Resources
- CIS-VR - Certified Implementation Specialist - Vulnerability Response
- CIS-Discovery - Certified Implementation Specialist - Discovery
- CIS-HAM - Certified Implementation Specialist – Hardware Asset Management
- CIS-FSM - Certified Implementation Specialist - Field Service Management
- CIS-RC - Certified Implementation Specialist - Risk and Compliance
- CIS-TPRM - Certified Implementation Specialist - Third-party Risk Management
- CIS-SM - Certified Implementation Specialist - Service Mapping
- CIS-EM - Certified Implementation Specialist - Event Mangement
- CIS-SIR - Certified Implementation Specialist - Security Incident Response
- CAS-PA - Certified Application Specialist - Performance Analytics
Purchase CAD Exam Training Products Individually
Why customers love us?
What do our customers say?
The resources provided for the ServiceNow certification exam were exceptional. The exam dumps and video courses offered clear and concise explanations of each topic. I felt thoroughly prepared for the CAD test and passed with ease.
Studying for the ServiceNow certification exam was a breeze with the comprehensive materials from this site. The detailed study guides and accurate exam dumps helped me understand every concept. I aced the CAD exam on my first try!
I was impressed with the quality of the CAD preparation materials for the ServiceNow certification exam. The video courses were engaging, and the study guides covered all the essential topics. These resources made a significant difference in my study routine and overall performance. I went into the exam feeling confident and well-prepared.
The CAD materials for the ServiceNow certification exam were invaluable. They provided detailed, concise explanations for each topic, helping me grasp the entire syllabus. After studying with these resources, I was able to tackle the final test questions confidently and successfully.
Thanks to the comprehensive study guides and video courses, I aced the CAD exam. The exam dumps were spot on and helped me understand the types of questions to expect. The certification exam was much less intimidating thanks to their excellent prep materials. So, I highly recommend their services for anyone preparing for this certification exam.
Achieving my ServiceNow certification was a seamless experience. The detailed study guide and practice questions ensured I was fully prepared for CAD. The customer support was responsive and helpful throughout my journey. Highly recommend their services for anyone preparing for their certification test.
I couldn't be happier with my certification results! The study materials were comprehensive and easy to understand, making my preparation for the CAD stress-free. Using these resources, I was able to pass my exam on the first attempt. They are a must-have for anyone serious about advancing their career.
The practice exams were incredibly helpful in familiarizing me with the actual test format. I felt confident and well-prepared going into my CAD certification exam. The support and guidance provided were top-notch. I couldn't have obtained my ServiceNow certification without these amazing tools!
The materials provided for the CAD were comprehensive and very well-structured. The practice tests were particularly useful in building my confidence and understanding the exam format. After using these materials, I felt well-prepared and was able to solve all the questions on the final test with ease. Passing the certification exam was a huge relief! I feel much more competent in my role. Thank you!
The certification prep was excellent. The content was up-to-date and aligned perfectly with the exam requirements. I appreciated the clear explanations and real-world examples that made complex topics easier to grasp. I passed CAD successfully. It was a game-changer for my career in IT!


